

Appearance

Merge Tags
Merge tags are placeholders that your sending platform replaces with real values when the email goes out, such as a recipient's name, an unsubscribe link, or custom data.
They follow a specific format. Default format of merge tags is:
*|MERGE_TAG|*Defining Merge Tags
Topol Plugin is pre-defined with only one merge tag for dynamic insertion of customer's first name:
*|FIRST_NAME|*Additional values, such as a customer's full name, academic title, email, or personalized greeting, are defined as custom merge tags in a mergeTags array within the TOPOL_OPTIONS object, using the syntax shown in this example:
ts
mergeTags: [
    {
      name: "Name tags", // Group of merge tags
      items: [
        {
          value: "*|FIRST_NAME|*", // Text to be inserted
          text: "First name", // Shown text in the menu
          label: "Customer's first name", // Shown description title in the menu
        },
        {
          value: "*|LAST_NAME|*",
          text: "Last name",
          label: "Customer's last name",
        },
      ],
    },
    {
      name: "Personal details", // Group of merge tags
      items: [
        {
          value: "*|AGE|*",
          text: "Age",
          label: "Customer's age",
        },
        {
          value: "*|TITLE|*",
          text: "Academic title",
          label: "Customer's academic title",
        },
      ],
    },
    {
      name: "Special links", // Group of merge tags
      items: [
        {
          value: '<a href="*|UNSUBSCRIBE_LINK|*">Unsubscribe</a>',
          text: "Unsubscribe",
          label: "Unsubscribe link",
        },
        {
          value: '<a href="*|WEB_VERSION_LINK|*">Web version</a>',
          text: "Web version",
          label: "Web version link",
        },
      ],
    },
    {
      name: "Special content", // Group of merge tags
      items: [
        {
          value: 'For more details, please visit our <a href="https://www.shop.shop">e-shop</a>!',
          text: "Visit our site",
          label: "Call to Action",
        },
      ],
    },
],value, text, and label are all required on every merge tag, and name plus items on every group. Between the opening and closing brackets, a value may contain only letters, digits, underscores, dots, and square brackets, so a value containing a space is dropped from the editor. Tags whose value is an HTML snippet, like the unsubscribe link above, work in the text editor but are not offered in URL and text fields on block forms.
INFO
It is important to note that, by default, only the merge tags defined within this unique mergeTags array will be available in the plugin text editor (TinyMCE). However, you can dynamically update all merge tags with new values without needing to rewrite the mergeTags code each time.
Additionally, you can create custom mergeTags arrays for different purposes and switch between them dynamically.
The feature that enables you to do all of these things is called Update Merge Tags, which we will discuss in a separate topic at the end of this chapter.
Once defined, you will find them in the text editor toolbar. The following image shows the merge tags organized into a nested structure, which we will discuss next.

Nested Merge Tags
In order to create more complex organization of your merge tags, you can nest groups of merge tags within other groups.
Code example:
ts
mergeTags: [
  {
    name: "Merge tags", // Main group name
    items: [
      {
        value: "*|FIRST_NAME|*", // Text to be inserted
        text: "First name", // Shown text in the menu
        label: "Customer's first name", // Shown description title in the menu
      },
      {
        value: "*|LAST_NAME|*",
        text: "Last name",
        label: "Customer's last name",
      },
      {
        name: "Merge tags nested", // Nested group name
        items: [
          {
            value: "*|FIRST_NAME_NESTED|*", // Text to be inserted
            text: "First name 2", // Shown text in the menu
            label: "Customer's first name 2", // Shown description title in the menu
          },
          {
            value: "*|LAST_NAME_NESTED|*",
            text: "Last name 2",
            label: "Customer's last name 2",
          },
        ],
      },
    ],
  },
];
Default Merge Tag Values
Preview mode shows how a message will appear once Merge Tags are replaced with actual data. More information is in the Merge Tag Previews section.
By default the Preview starts with empty input fields, one per Merge Tag, filled in by hand. Setting a default test value in a Merge Tag's configuration makes the Preview populate that field automatically instead.
To enable this behavior, add the defaultValue property to the Merge Tag definition object, as shown below:
ts
{
  value: "*|FIRST_NAME|*",
  text: "First name",
  label: "Customer's first name",
  // Default test value for the *|FIRST_NAME|* Merge Tag in Preview mode
  defaultValue: "John",
},
Smart Merge Tags
By default, merge tags inserted into templates are static, meaning that once you insert one into your template, you cannot quickly swap it for another merge tag.
Setting all merge tags as smart merge tags makes them easier to work with. They then appear as shown here:
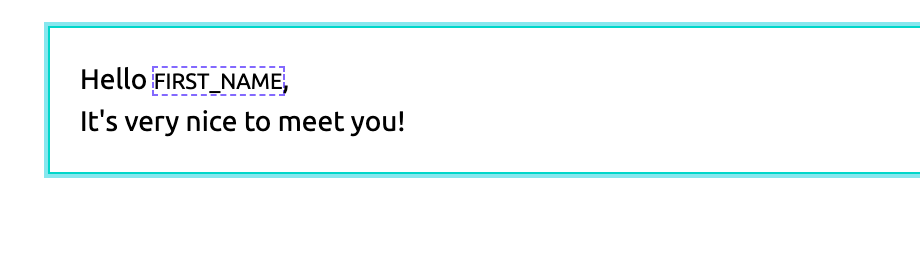
This option allows you to interact with each inserted merge tag by clicking on it. When you do so, a modal window will pop up, allowing you to browse through your other defined merge tags and choose which one will replace the original one in your template.
Enable the Smart Merge Tags feature with:
ts
smartMergeTags: {
    enabled: true,
}
Merge Tag Value Autocompletion
To avoid constantly browsing through your collection of merge tags, the Topol Plugin offers an autocomplete feature. Typing the opening characters of a merge tag (*| by default) followed by at least one more character brings up a list of matching suggestions. Setting a custom syntax changes the opening characters accordingly. It works in both the TinyMCE and Tiptap text editors.
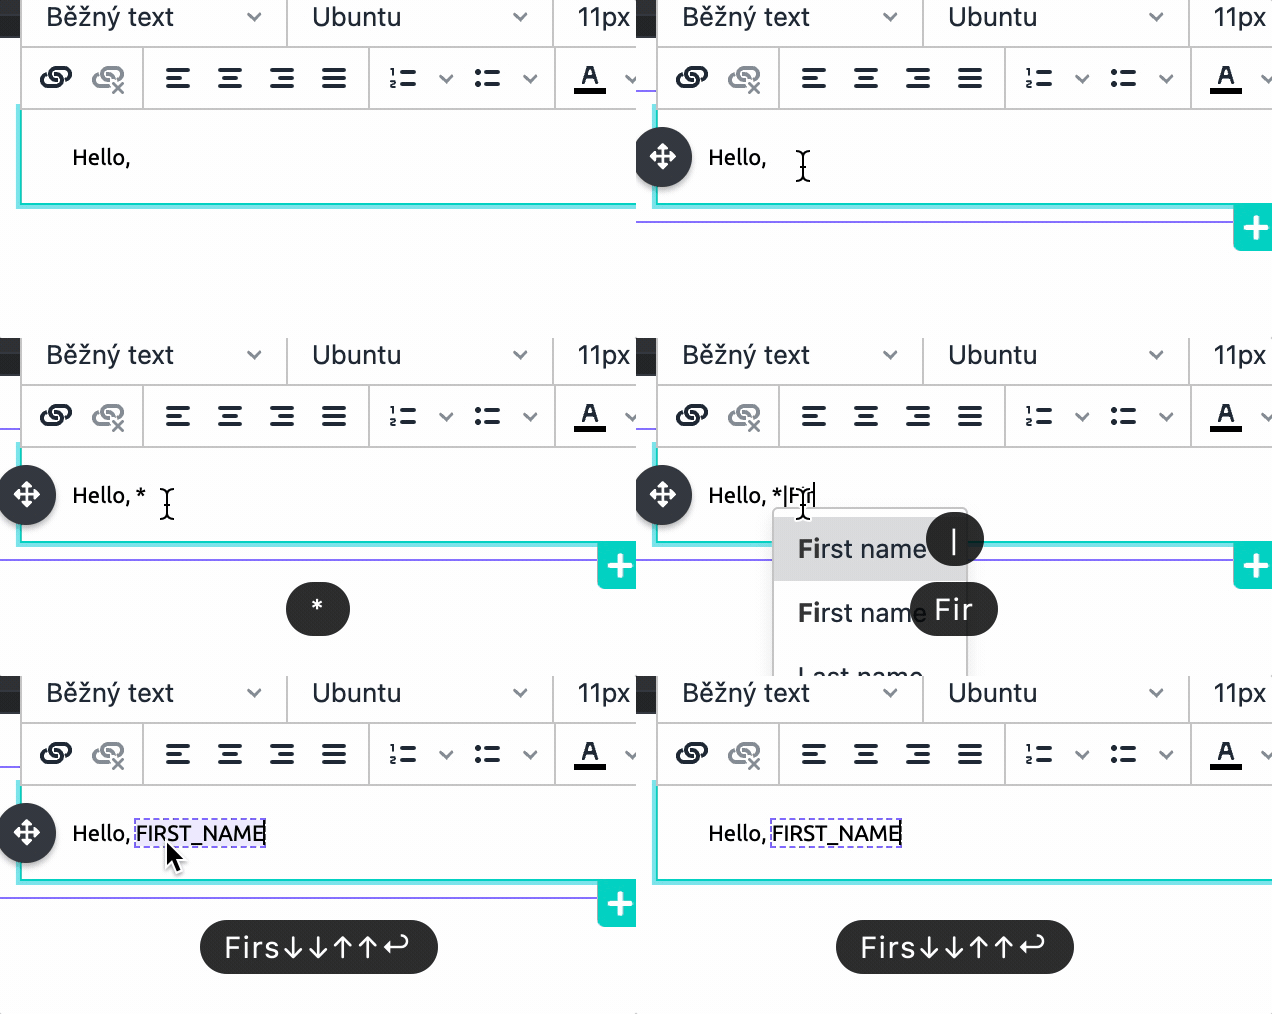
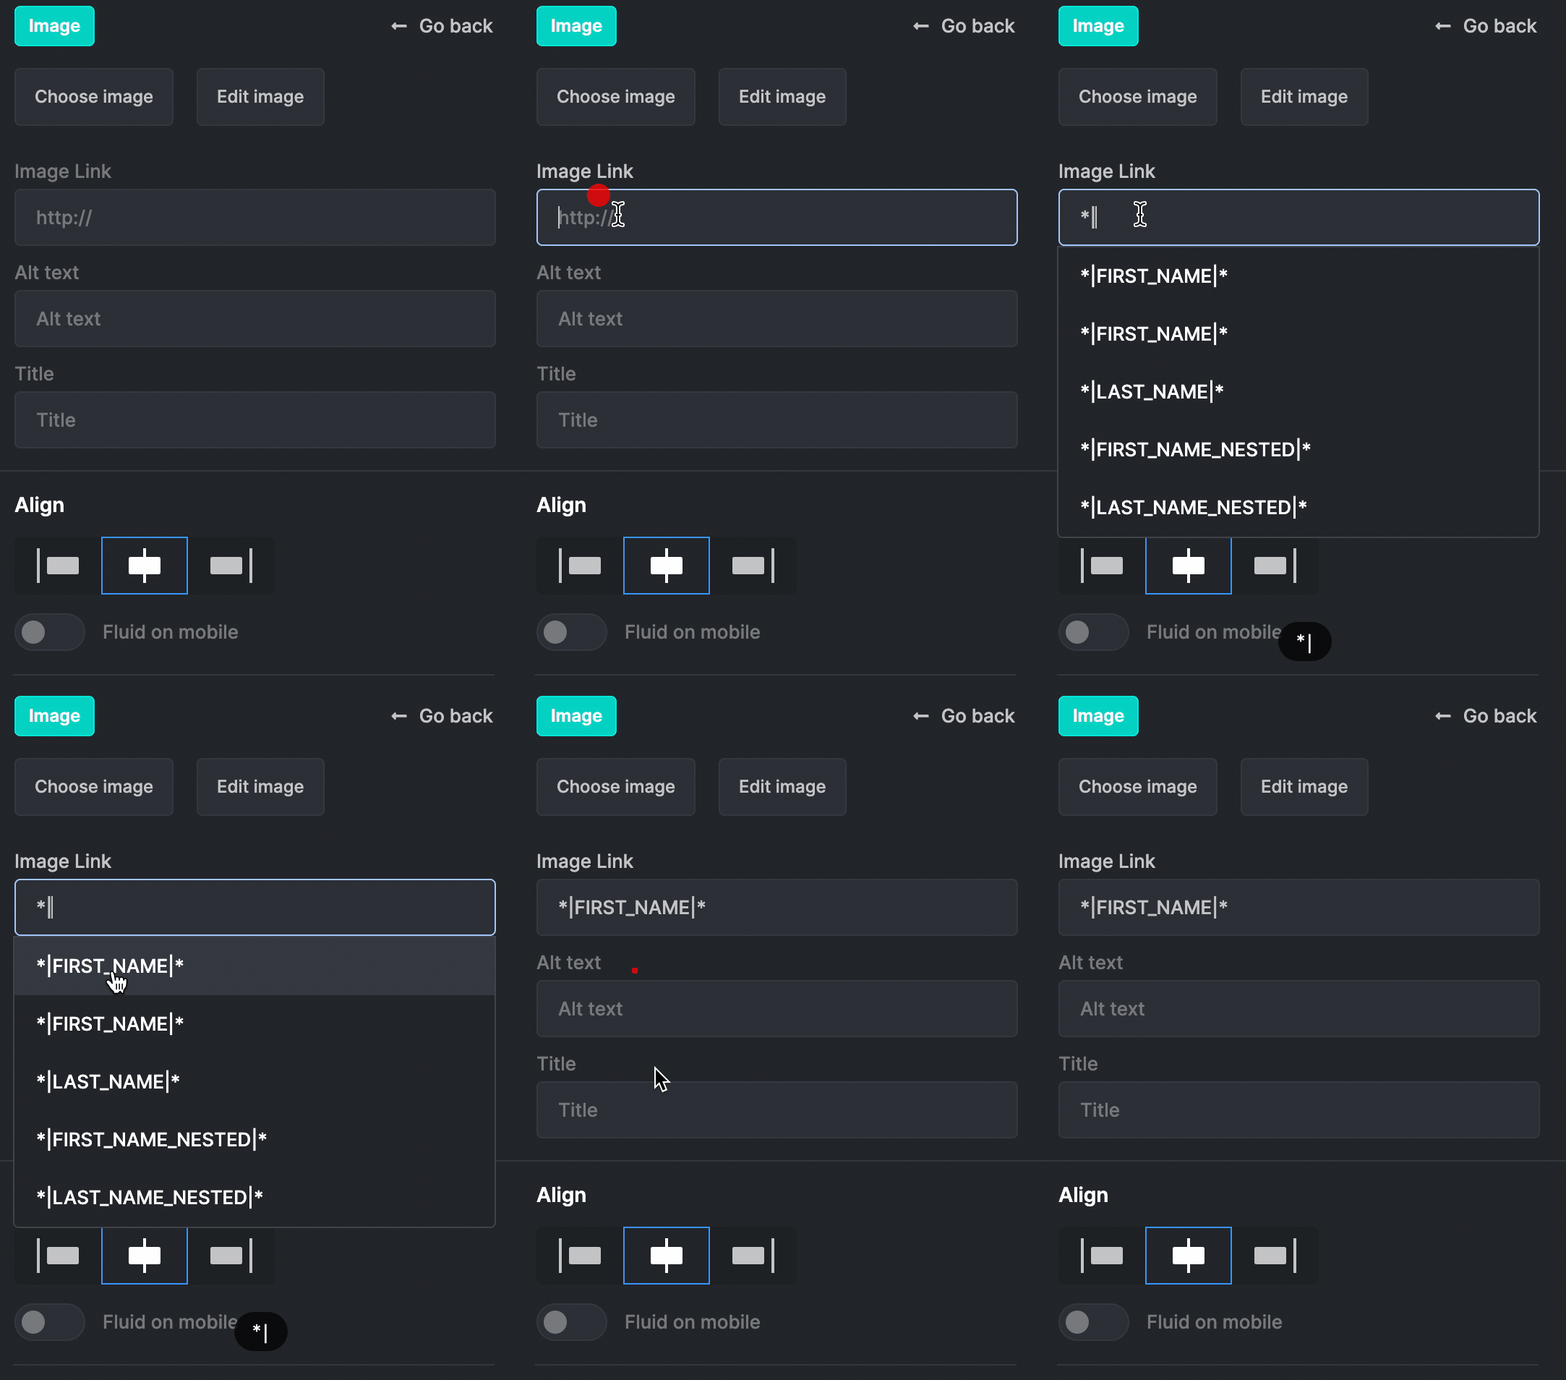
The autocomplete feature is also implemented in many other text fields.
Merge Tag-Specific Autosuggestions for Variants
INFO
This section applies exclusively to the Conditional Content feature. If you are not using Conditional Content, you can safely skip this section.
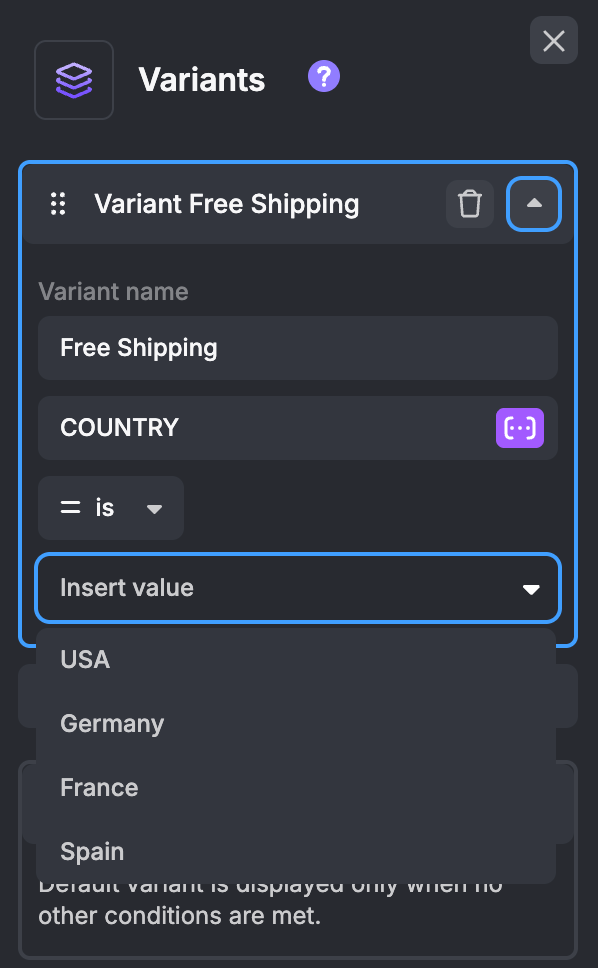
Our Conditional Content feature allows you to display a specific variant of a structure only when a defined condition is met. This condition consists of three elements: a Merge Tag, a custom value, and a logical operator. At send time, the custom value is compared with the actual value of the selected Merge Tag using the defined logical operation.
To make this process more intuitive for users, you can define an array of autosuggestion values for each Merge Tag. These suggestions help users quickly choose a relevant value that corresponds to the selected Merge Tag.
ts
{
  value: "*|COUNTRY|*",
  text: "Country",
  label: "Free Shipping Countries",
  // available suggestions for this specific Merge Tag
  suggestions: ['USA','Germany','France','Spain'],
},
These suggested values are then available directly in the Variants panel when defining conditions for structure variants.
For more details about this feature, please visit the Conditional Content docs.
Custom Merge Tag Syntax
The syntax itself is configurable alongside the merge tag values. A syntax other than the default is set up with the following code:
ts
smartMergeTags: {
    enabled: true,
    syntax: {
      start: "{{",
      end: "}}"
      }
}
In this case, the syntax for your merge tag will be as follows:
{{MERGE_TAG}}start and end accept any string. The enabled key is required whenever a smartMergeTags object is passed, because an object missing it fails validation as a whole and the whole option is discarded. Its value may be false, and a custom syntax still applies.
Displaying the Merge Tag Name
An inserted merge tag normally shows its raw value in the editor (for example *|FIRST_NAME|*). Because real values are often long, you can show the tag's human-readable name instead (the text field from its definition, for example "First name").
WARNING
This feature is available only with the Tiptap text editor, not with the default TinyMCE editor. Set textEditor: "tiptap" for it to take effect. See Text Editor Configuration for how to switch editors.
The option configures the Tiptap editor, so it lives in the tiptapConfig object:
ts
textEditor: "tiptap",
tiptapConfig: {
  showMergeTagText: true, // default: false
}
Each tag's display name is resolved from your current mergeTags definitions by matching its value, so it picks up new names from a dynamic Update Merge Tags call. When a value is not found (a renamed or removed tag, or a value typed in by hand), the editor falls back to the raw value.
INFO
This setting affects only how merge tags appear inside the editor. The exported HTML is unchanged, so your ESP receives the same value regardless of this setting.
Update Merge Tags
Until now, we have only used the default mergeTags array, as described here. This predefined set of merge tags was loaded into our plugin at initialization, and changing these tags required rewriting the mergeTags code.
To make things even more cumbersome, there was no way to switch between different mergeTags arrays "on the fly" when certain conditions were met (event trigger, change of display mode, etc.).
To fix these issues, you can utilize this callable function:
ts
window.TopolPlugin.setMergeTags(mergeTags);First, define your custom mergeTags arrays with standard structure, as shown on the examples below:
ts
const catMergeTags = [
  {
    name: "Cat Merge Tags",
    items: [
      {
        value: "*|CAT_NAME|*",
        text: "Cat Name",
        label: "Name of customer's cat",
      },
      {
        value: "*|CAT_BREED|*",
        text: "Cat Breed",
        label: "Breed of customer's cat",
      },
    ],
  },
];

const dogMergeTags = [
  {
    name: "Dog Merge Tags",
    items: [
      {
        value: "*|DOG_NAME|*",
        text: "Dog Name",
        label: "Name of customer's dog",
      },
      {
        value: "*|DOG_BREED|*",
        text: "Dog Breed",
        label: "Breed of customer's dog",
      },
    ],
  },
];
In order to dynamically load either of these additional mergeTags array while the Plugin is running, you have two options:
- Define an event handler that invokes the
window.TopolPlugin.setMergeTags(...)function with the variable name of the specific merge tags array used as its argument when the event is triggered:
ts
window.TopolPlugin.setMergeTags(catMergeTags);
// or
window.TopolPlugin.setMergeTags(dogMergeTags);- Run the function in the console within the same browser window where the plugin is already initialized and running. In this case, it's easier to use the array directly as an argument instead of calling it via a variable (option 1). If you still prefer to use the array's variable name, you must also copy its definition to the console (option 2).
ts
// Run in the console within the same browser window where the Plugin is initialized.

// Option 1
window.TopolPlugin.setMergeTags([
  {
    name: "Cat Merge Tags",
    items: [
      {
        value: "*|CAT_NAME|*",
        text: "Cat Name",
        label: "Name of customer's cat",
      },
      {
        value: "*|CAT_BREED|*",
        text: "Cat Breed",
        label: "Breed of customer's cat",
      },
    ],
  },
]);

// or Option 2
const catMergeTags = [
  {
    name: "Cat Merge Tags",
    items: [
      {
        value: "*|CAT_NAME|*",
        text: "Cat Name",
        label: "Name of customer's cat",
      },
      {
        value: "*|CAT_BREED|*",
        text: "Cat Breed",
        label: "Breed of customer's cat",
      },
    ],
  },
];

window.TopolPlugin.setMergeTags(catMergeTags);
Calling this function during initialization
Calling setMergeTags on the line straight after TopolPlugin.init() is unreliable. The editor loads in an iframe, and a call made before it has registered its message listeners is discarded without an error, leaving the default merge tags in place.
Use the onInit callback instead, which runs once the editor is ready to receive messages:
ts
const TOPOL_OPTIONS = {
  // ...
  callbacks: {
    onInit() {
      window.TopolPlugin.setMergeTags(catMergeTags);
    },
  },
};

TopolPlugin.init(TOPOL_OPTIONS);
A comprehensive list of all callable functions available in the Topol Plugin can be found here.
Loop Merge Tags
Loop Merge Tags are a special type of merge tag used exclusively with Loop Blocks. Unlike standard merge tags, a Loop Merge Tag must include a childrenProperties array, which defines the structure of the items it represents.
Each Loop Merge Tag must follow this structure:
ts
{
  value: string, // For example {{product}} or {{item}}
  text: string,
  label: string,
  childrenProperties?: {
    value: string, // For example {{product_price}} or {{item_property}}
    text: string,
    label: string,
    type?: "image" | "button" | "number" | "text", // Defaults to "text"; defines how the child is rendered
  }[],
}
The childrenProperties array defines the fields available for each item of that Loop Merge Tag, such as name, image, price, or button. Each child property is a unique merge tag value that will later be replaced with real data at send time.
ts
mergeTags: [
  {
    name: "My e-shop",
    items: [
      {
        value: "{{PRODUCT}}",
        text: "Merge tag text",
        label: "Merge tag label",
        childrenProperties: [
          {
            value: "{{PRODUCT_NAME}}",
            text: "Product name",
            label: "Product name",
            type: "text",
          },
          {
            value: "{{PRODUCT_IMAGE}}",
            text: "Product image",
            label: "Product image",
            type: "image",
          },
        ],
      },
    ],
  },
];
Loop Merge Tags can only be used when linked to Loop Blocks. When a Loop Block is connected to a Loop Merge Tag, its structure mirrors the tag's childrenProperties: each attribute of the block corresponds to one child property.
At send time, your ESP replaces these child Merge Tags with real data from your dataset and automatically repeats the Loop Block for every item belonging to that Loop Merge Tag.
For more details about Loop Blocks feature, please visit the documentation.