

Appearance

Custom Google Cloud Storage
The Custom storage feature is available with the Plugin Expansion plan and higher.
If you're on the Plugin for Startup plan, consider upgrading to access this feature. For more details, visit our pricing page or contact support.
The Custom Cloud Storage feature in the Topol Plugin lets you connect your own storage provider. Alongside AWS S3, Cloudflare R2, and DigitalOcean Spaces, you can also use Google Cloud Storage. This tutorial walks through that setup step by step. The final step downloads a JSON key file; keep it safe, as it is needed to finish the setup in TOPOL.
How to configure custom Google Cloud Storage
1) Log in to the Google Cloud Console at https://console.cloud.google.com/.
2) Navigate to the Products section and click Create a storage bucket.
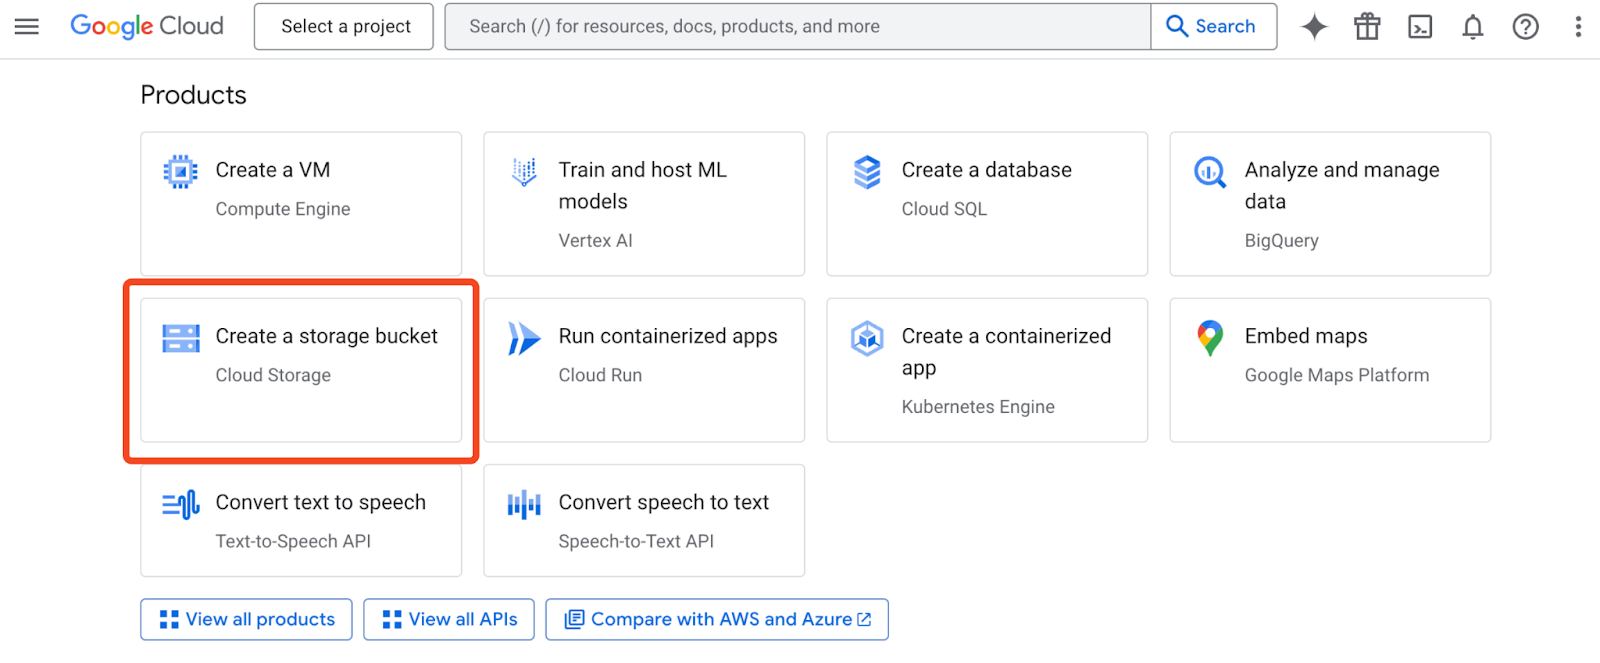
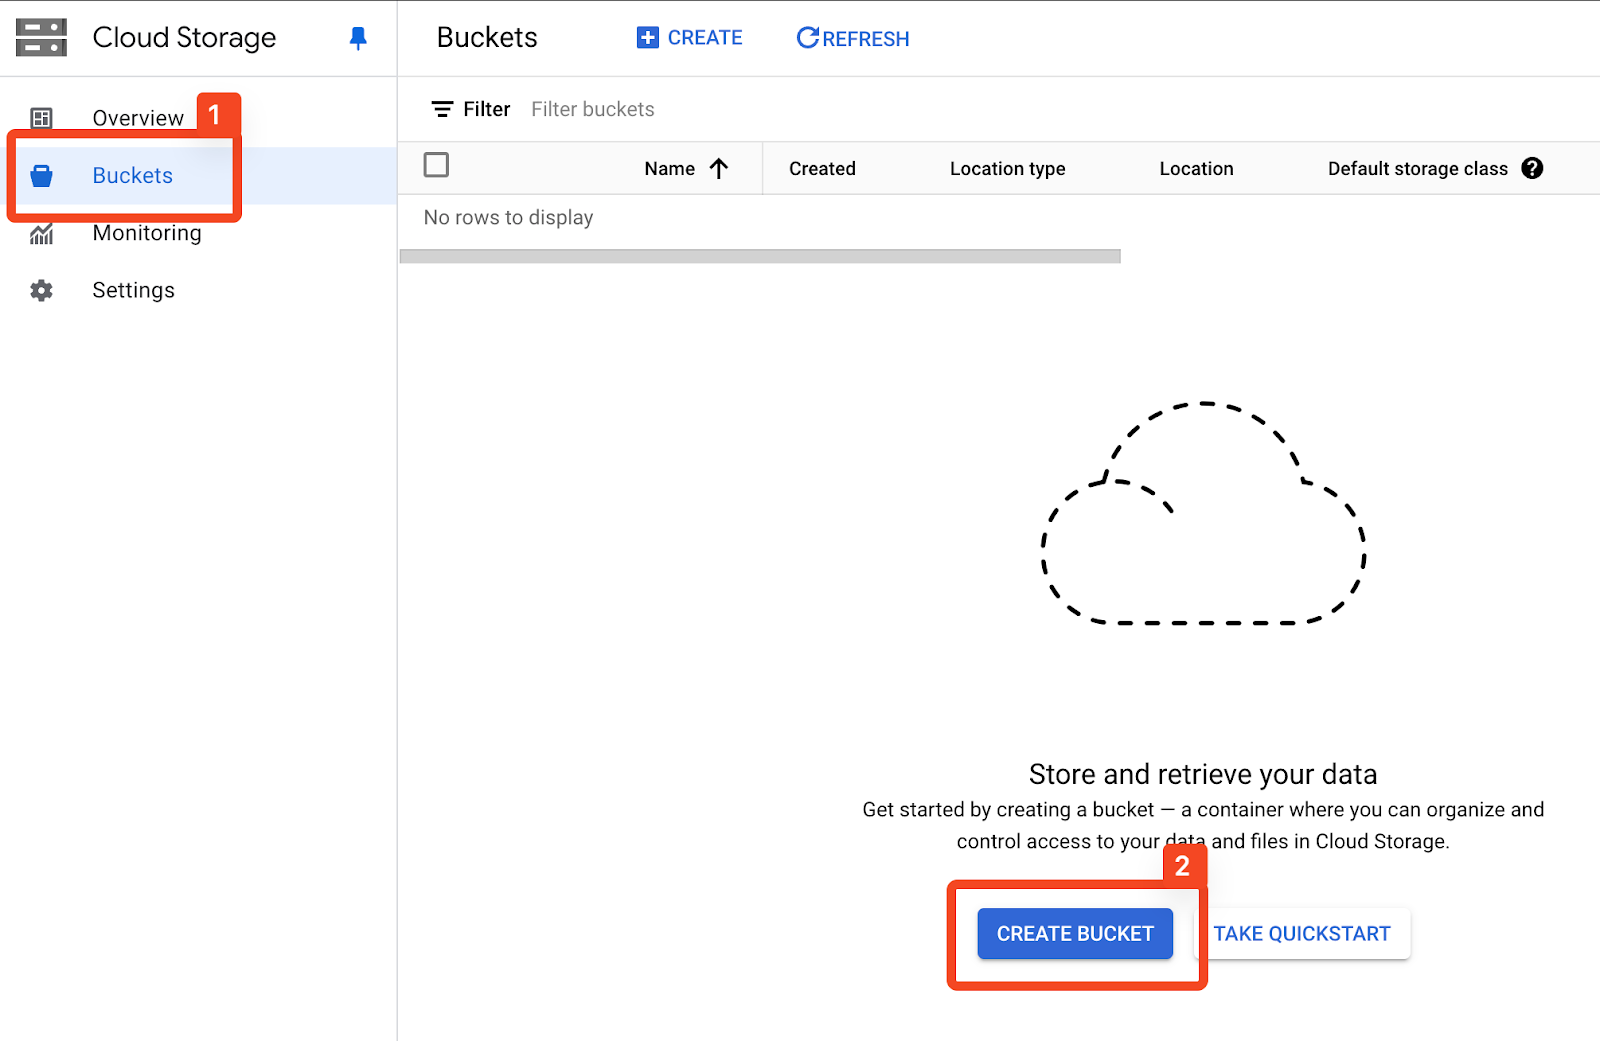
3) Open the Buckets submenu and click Create bucket.
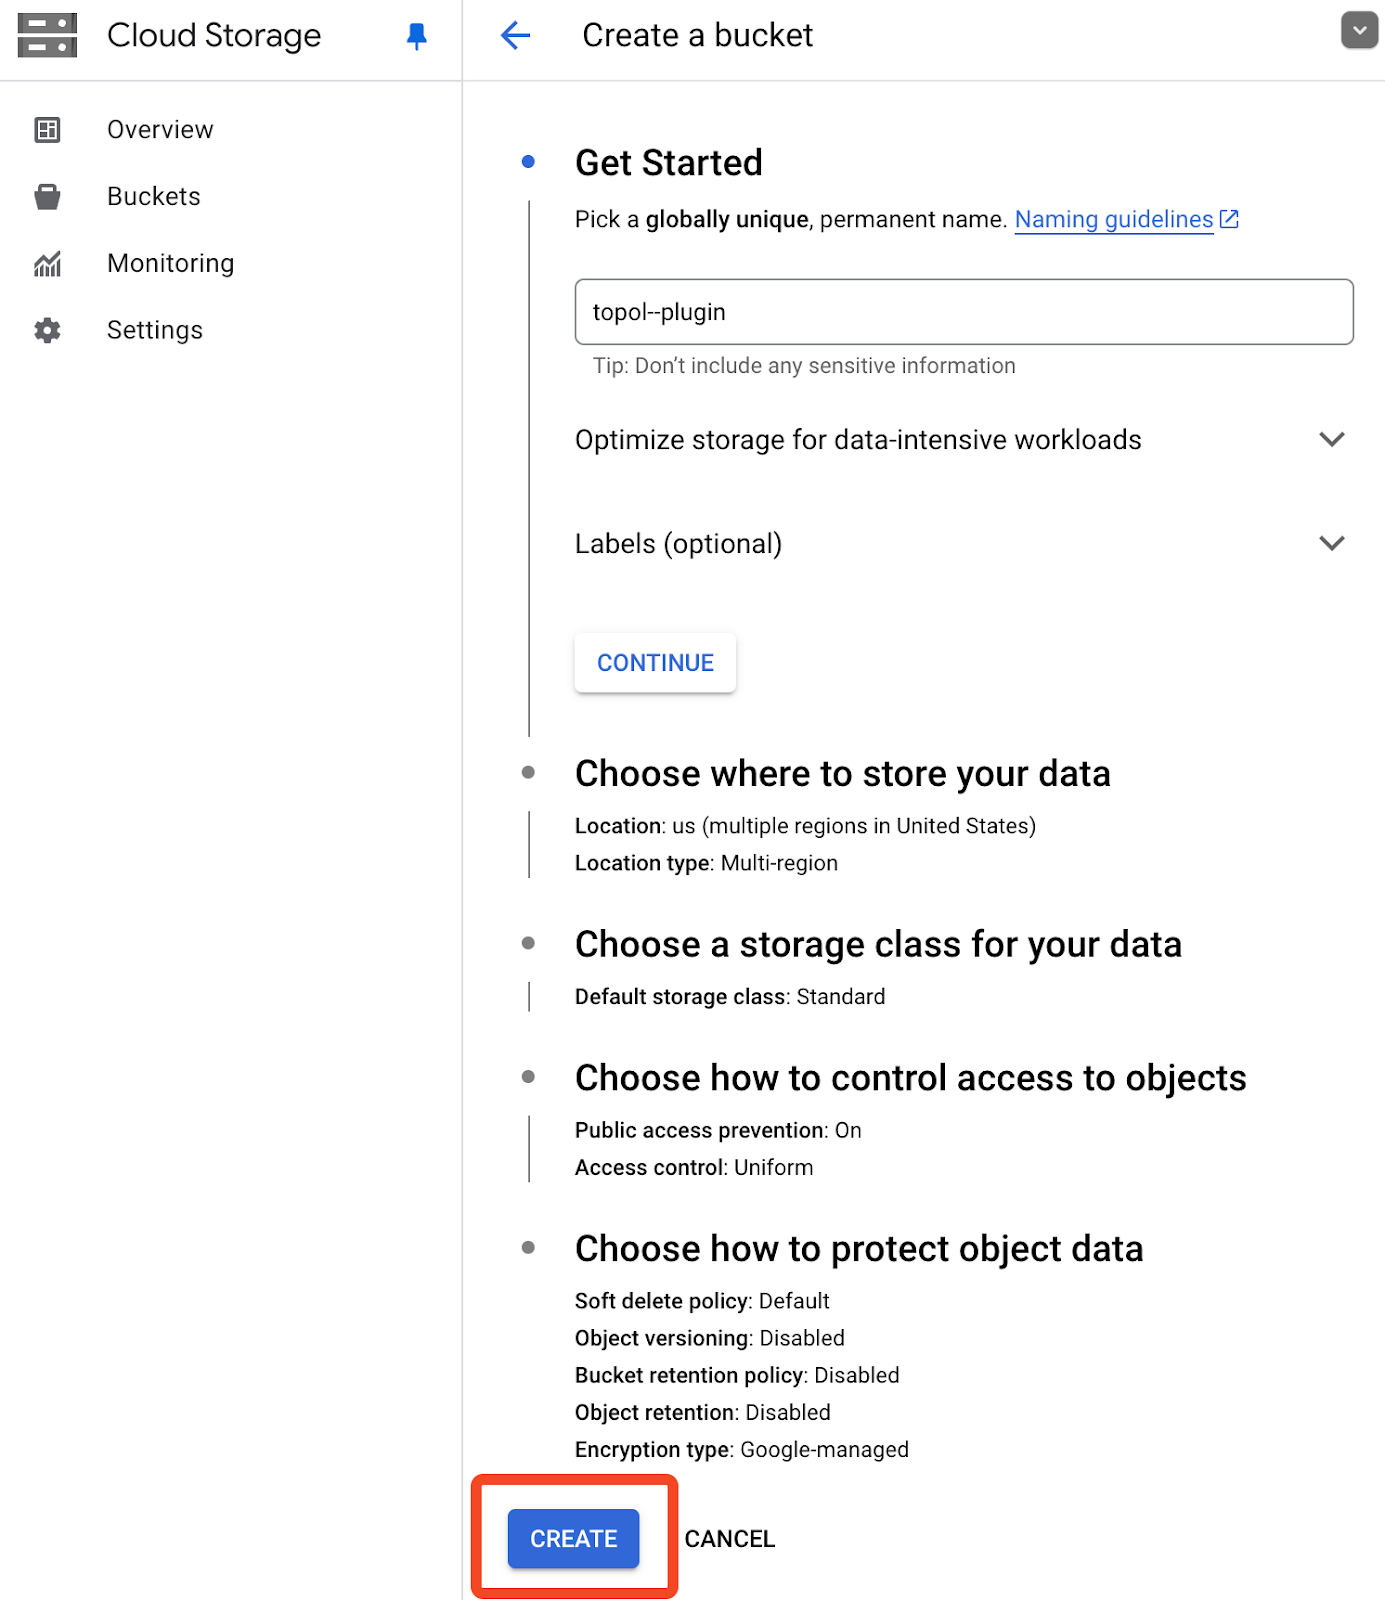
4) Fill out the form that appears and click Create.
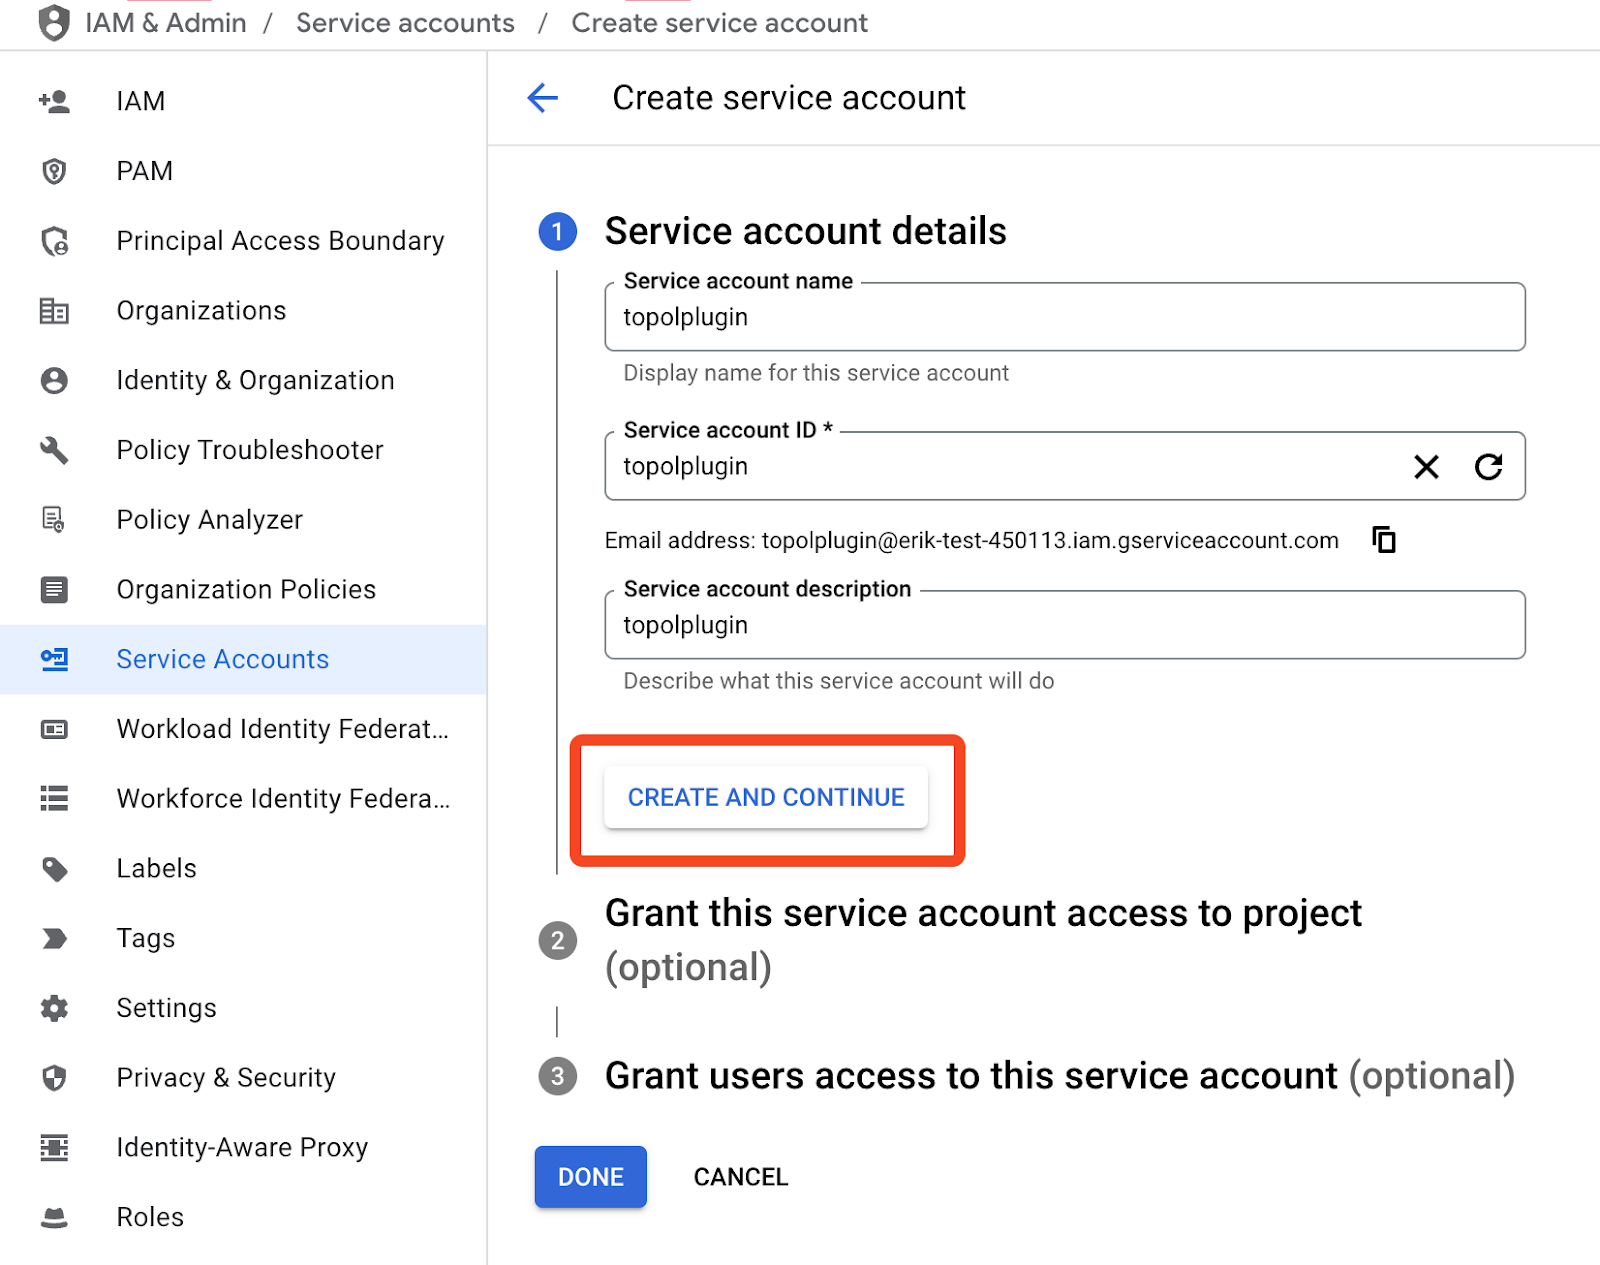
5) Navigate to Service Accounts under the IAM & Admin menu at https://console.cloud.google.com/iam-admin/serviceaccounts.
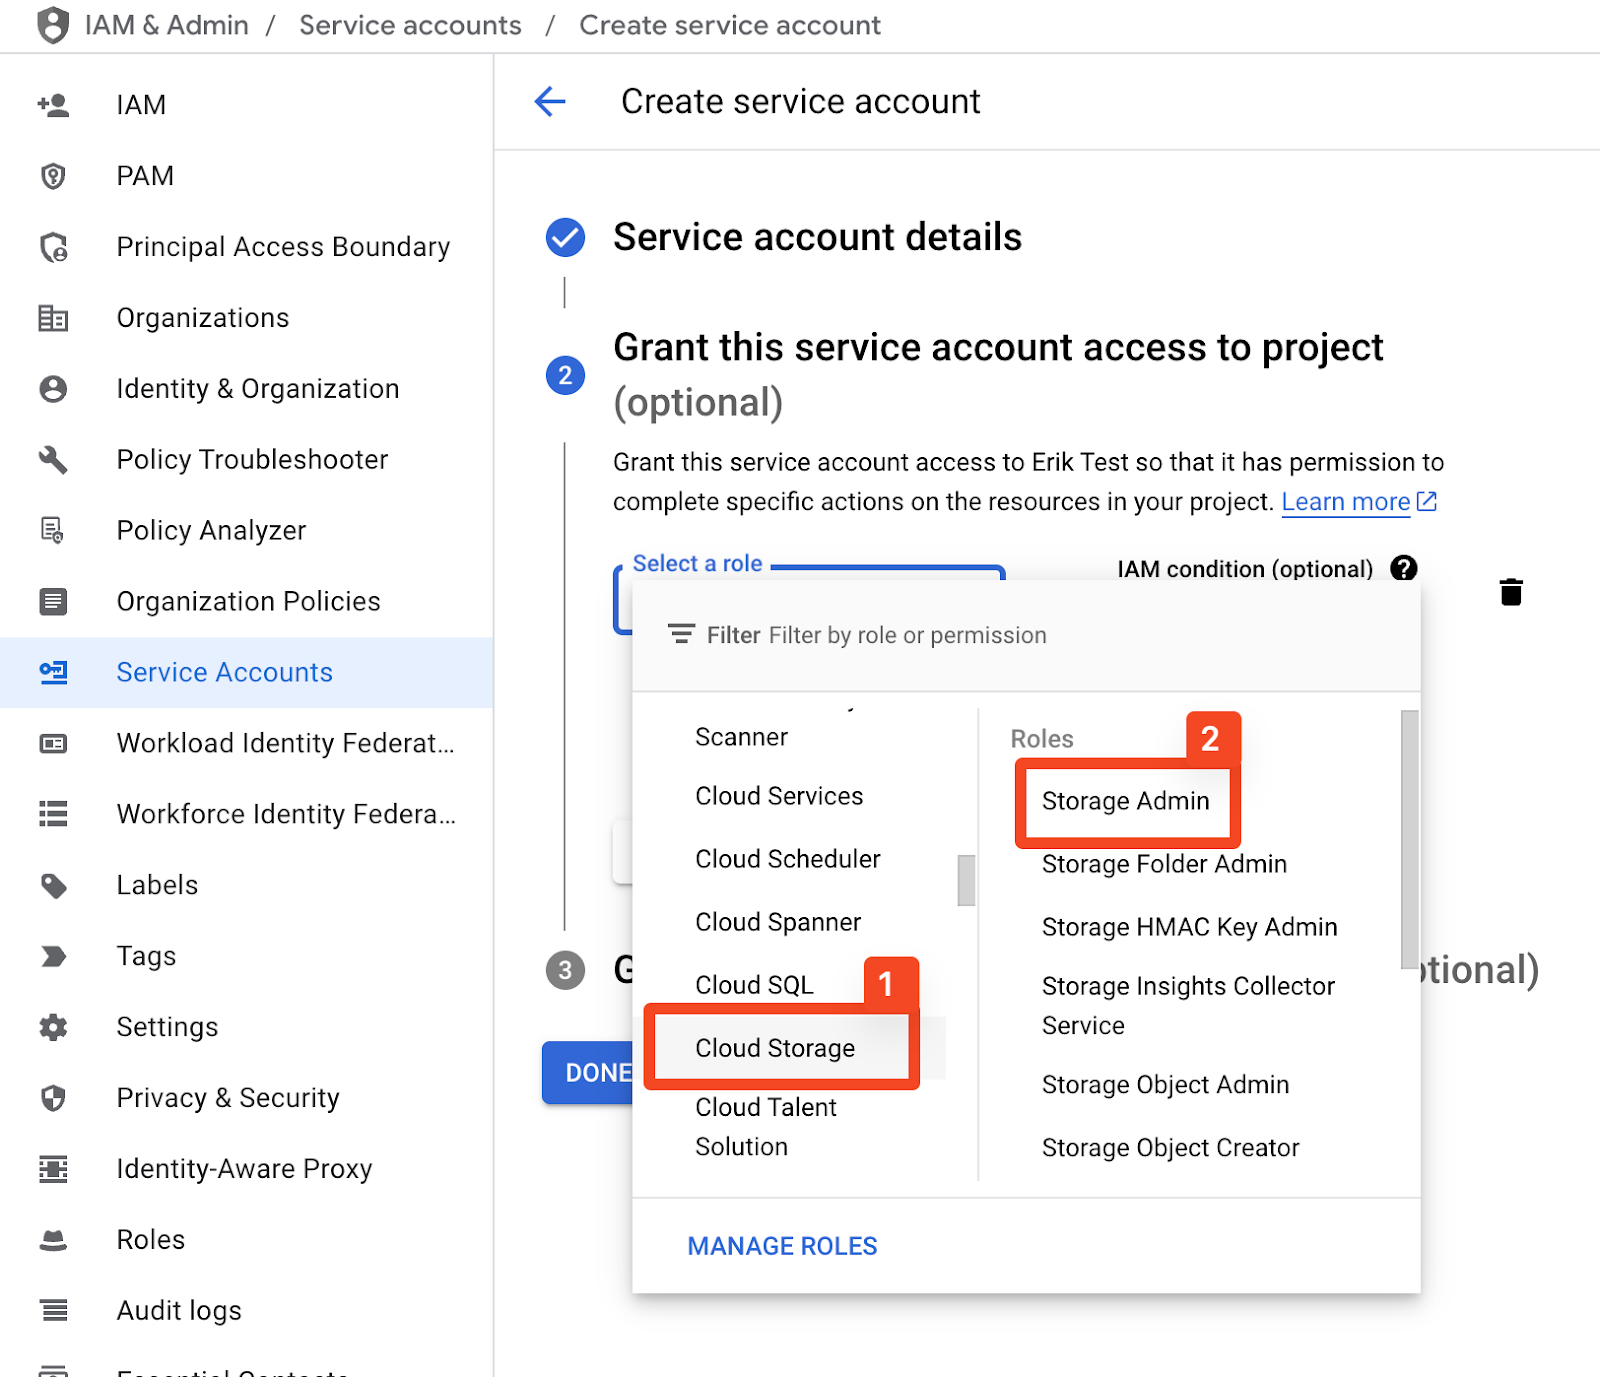
6) Begin creating a service account by following the on-screen steps 1 and 2 (step 3 is optional here). After completing step 1, click Create and Continue.
7) In step 2, select a role by choosing Cloud Storage - Storage Admin, then click Done.
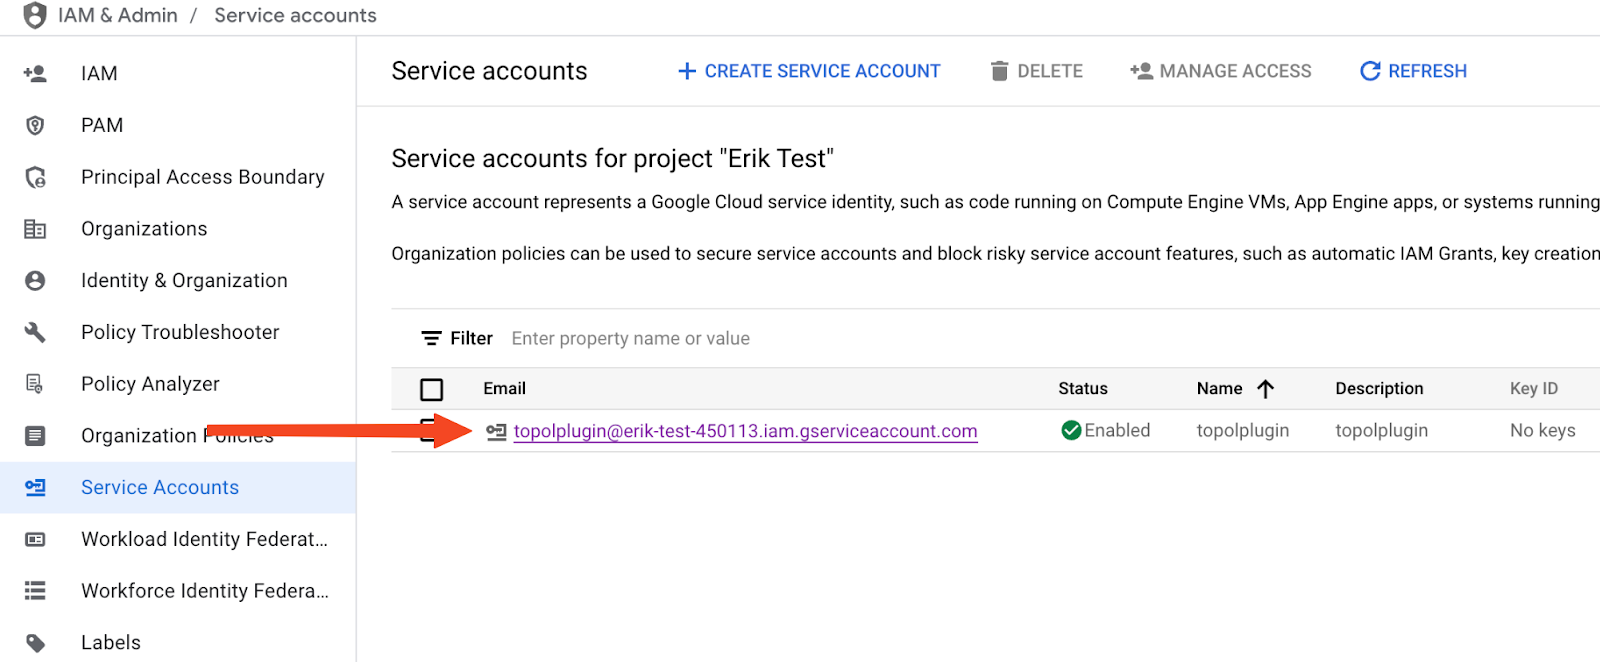
8) Click the email address of the newly created service account to open its details.
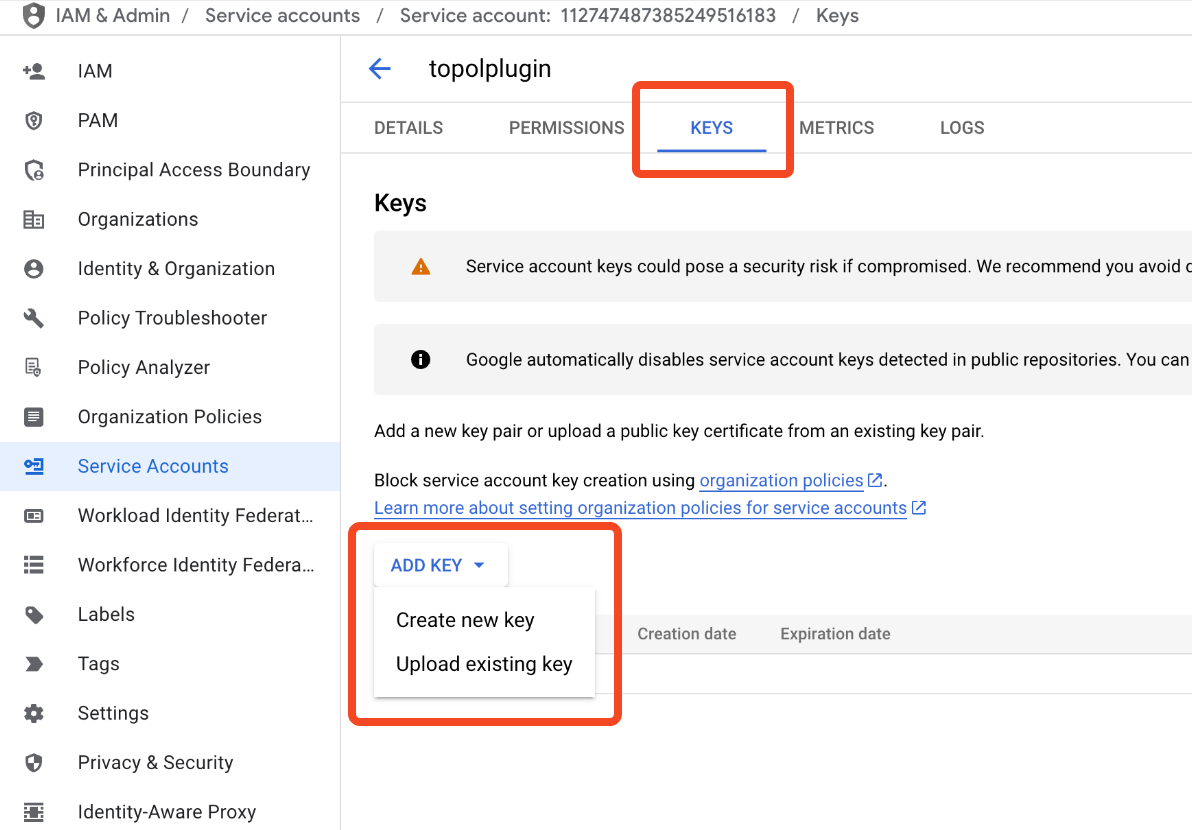
9) Open the Keys tab, click Add Key, and then Create a new key.
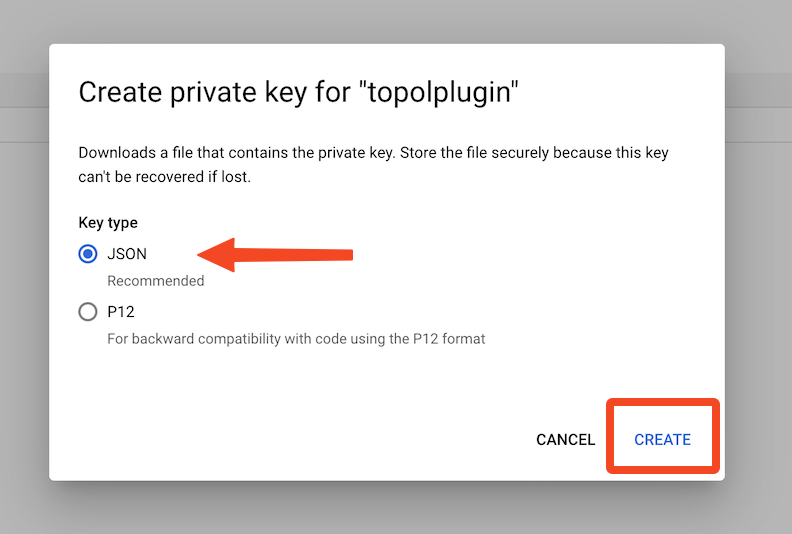
10) In the modal window that appears, select JSON type and confirm. This downloads a file containing the access information required to set up Custom Google Cloud Storage in the Topol Plugin settings. Save it for the next section.
Set your Google Cloud Storage credentials for the API Token in TOPOL
The remaining steps happen in the Topol app, using the JSON key file you downloaded.
1) Log in to your Topol account at https://app.topol.io/. The API Tokens tab is selected by default.
2) Select the API Token where you want to set up your own Google Cloud Storage and switch to the Configuration tab.
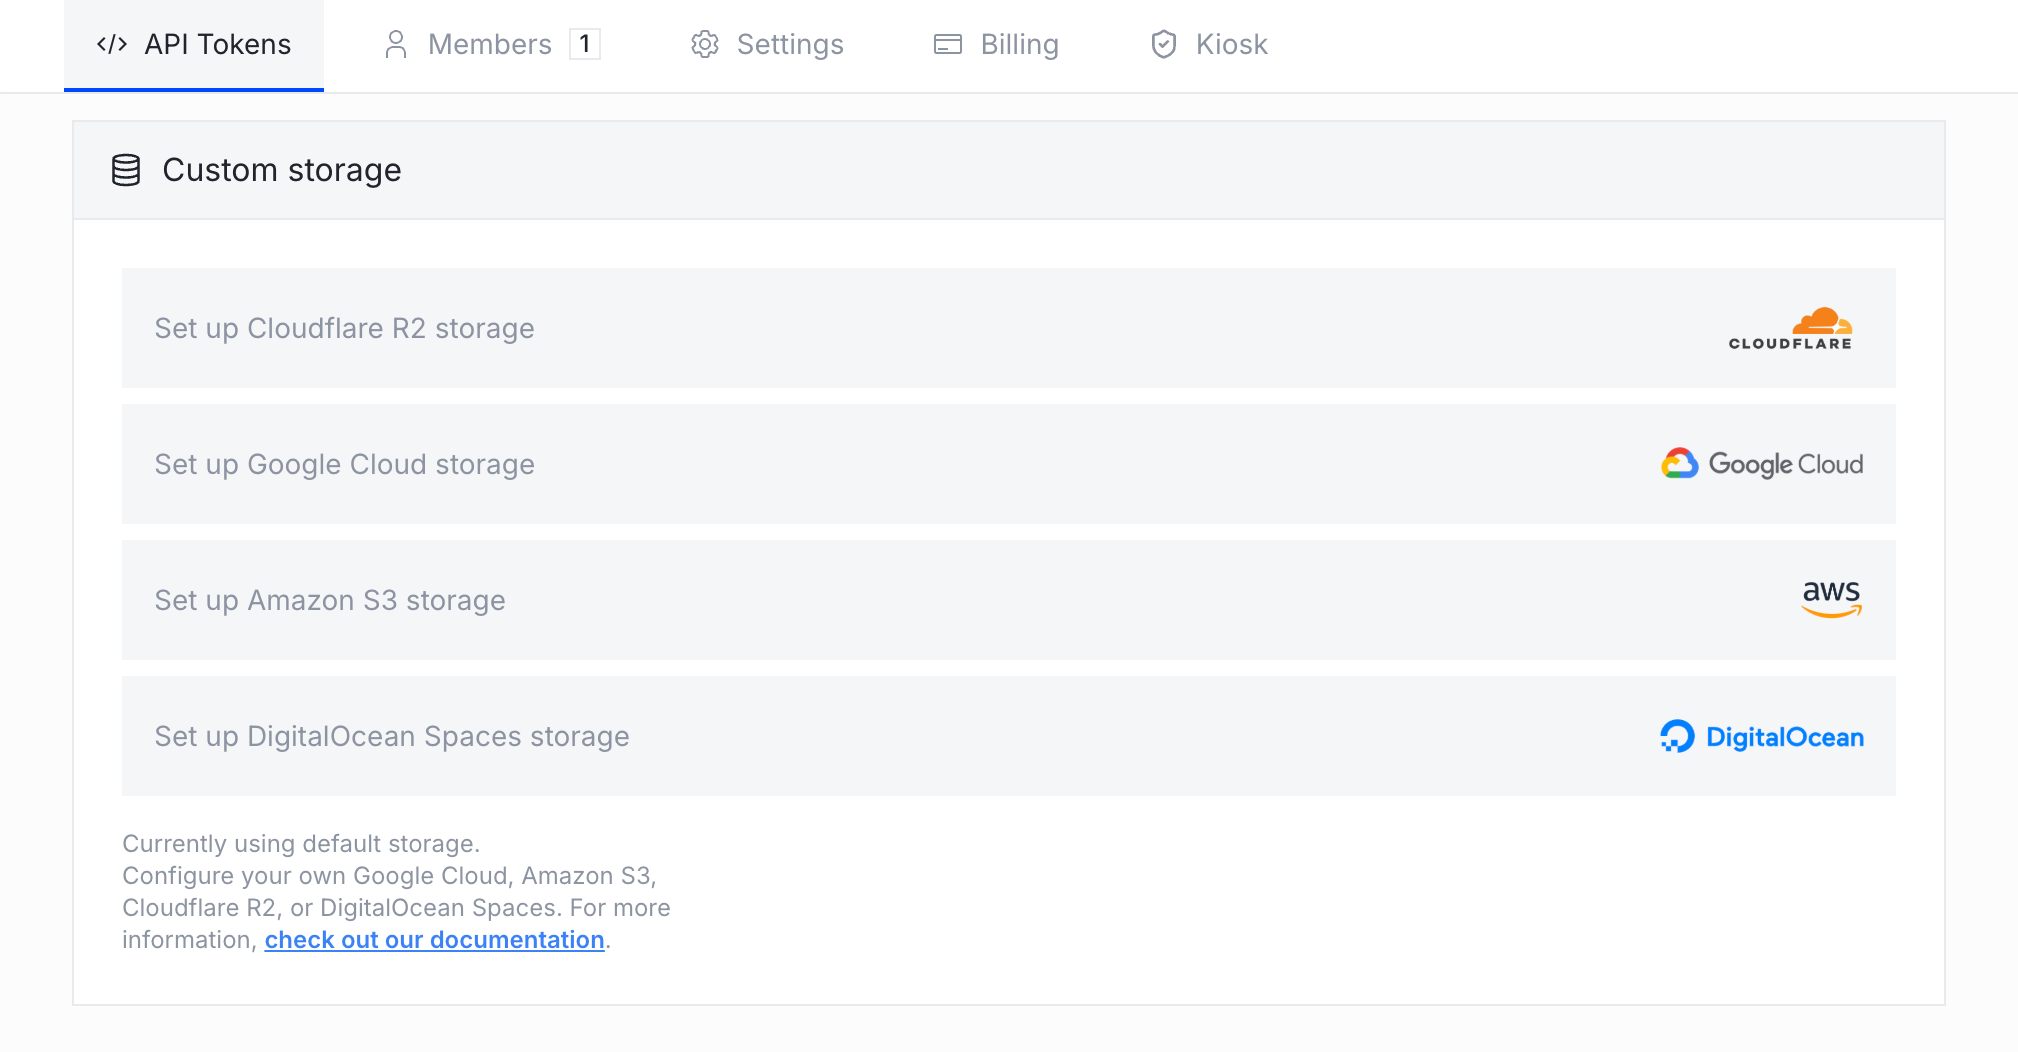
3) In the Custom storage section, click Set up Google Cloud storage.
4) A modal will appear. Fill in the details using the JSON key file you downloaded earlier:
- Bucket name: the bucket you created earlier.
- Region: the region you selected for your bucket (for example,
europe-west3). - Client Email: the
client_emailvalue from the JSON key file. - Project ID: the
project_idvalue from the JSON key file. - Private key: the
private_keyvalue from the JSON key file.
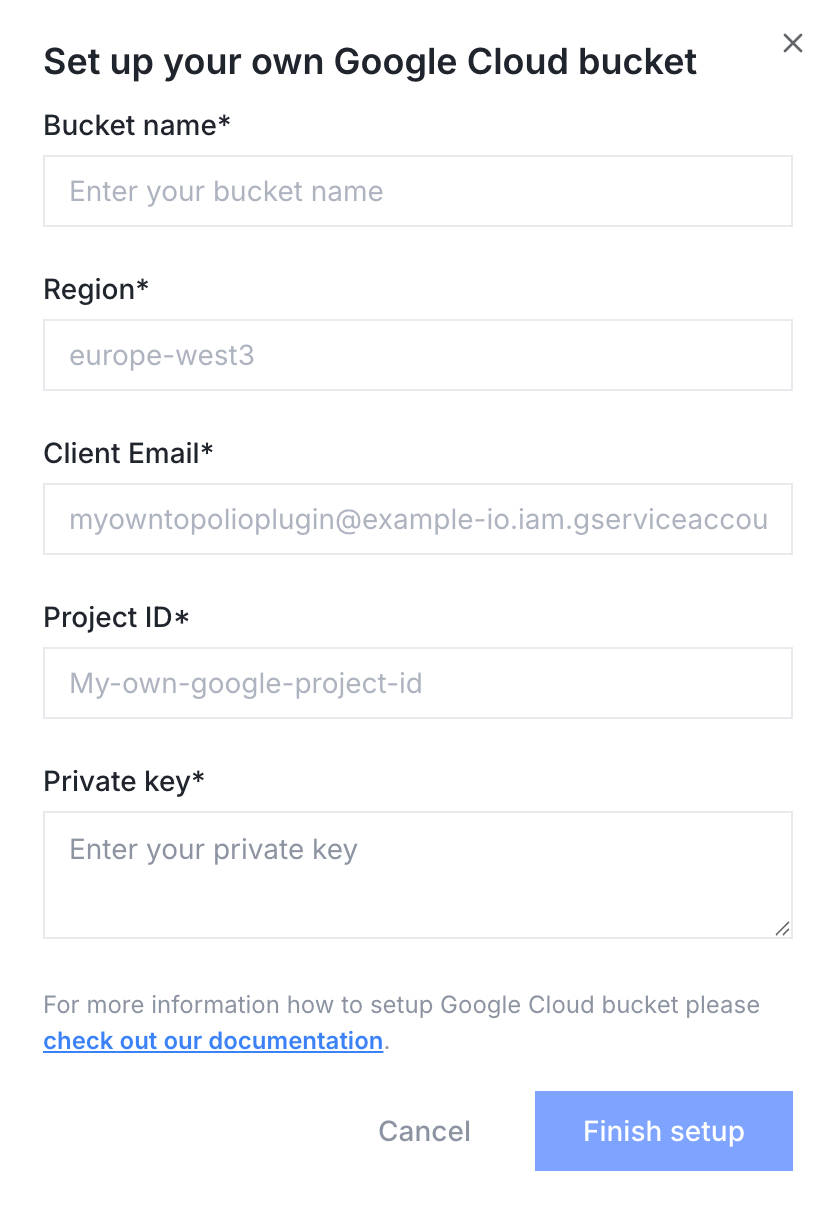
5) Click Finish setup.
Setup complete. The plugin now uploads files to your Google Cloud bucket.
If you hit any issues, contact our support.