

Appearance

Custom DigitalOcean Spaces Storage
The Custom storage feature is available with the Plugin Expansion plan and higher.
If you're on the Plugin for Startup plan, consider upgrading to access this feature. For more details, visit our pricing page or contact support.
The Custom Cloud Storage feature in the Topol Plugin lets you connect your own storage provider. Alongside AWS S3, Google Cloud Storage, and Cloudflare R2, you can also use DigitalOcean Spaces, an S3-compatible object storage. This tutorial walks through that setup step by step.
Throughout this guide, you will collect several values that you'll need at the very end (your bucket name, region, Origin Endpoint, access key, and secret key). Save each one somewhere safe as you go.
How to configure Custom DigitalOcean Spaces Storage
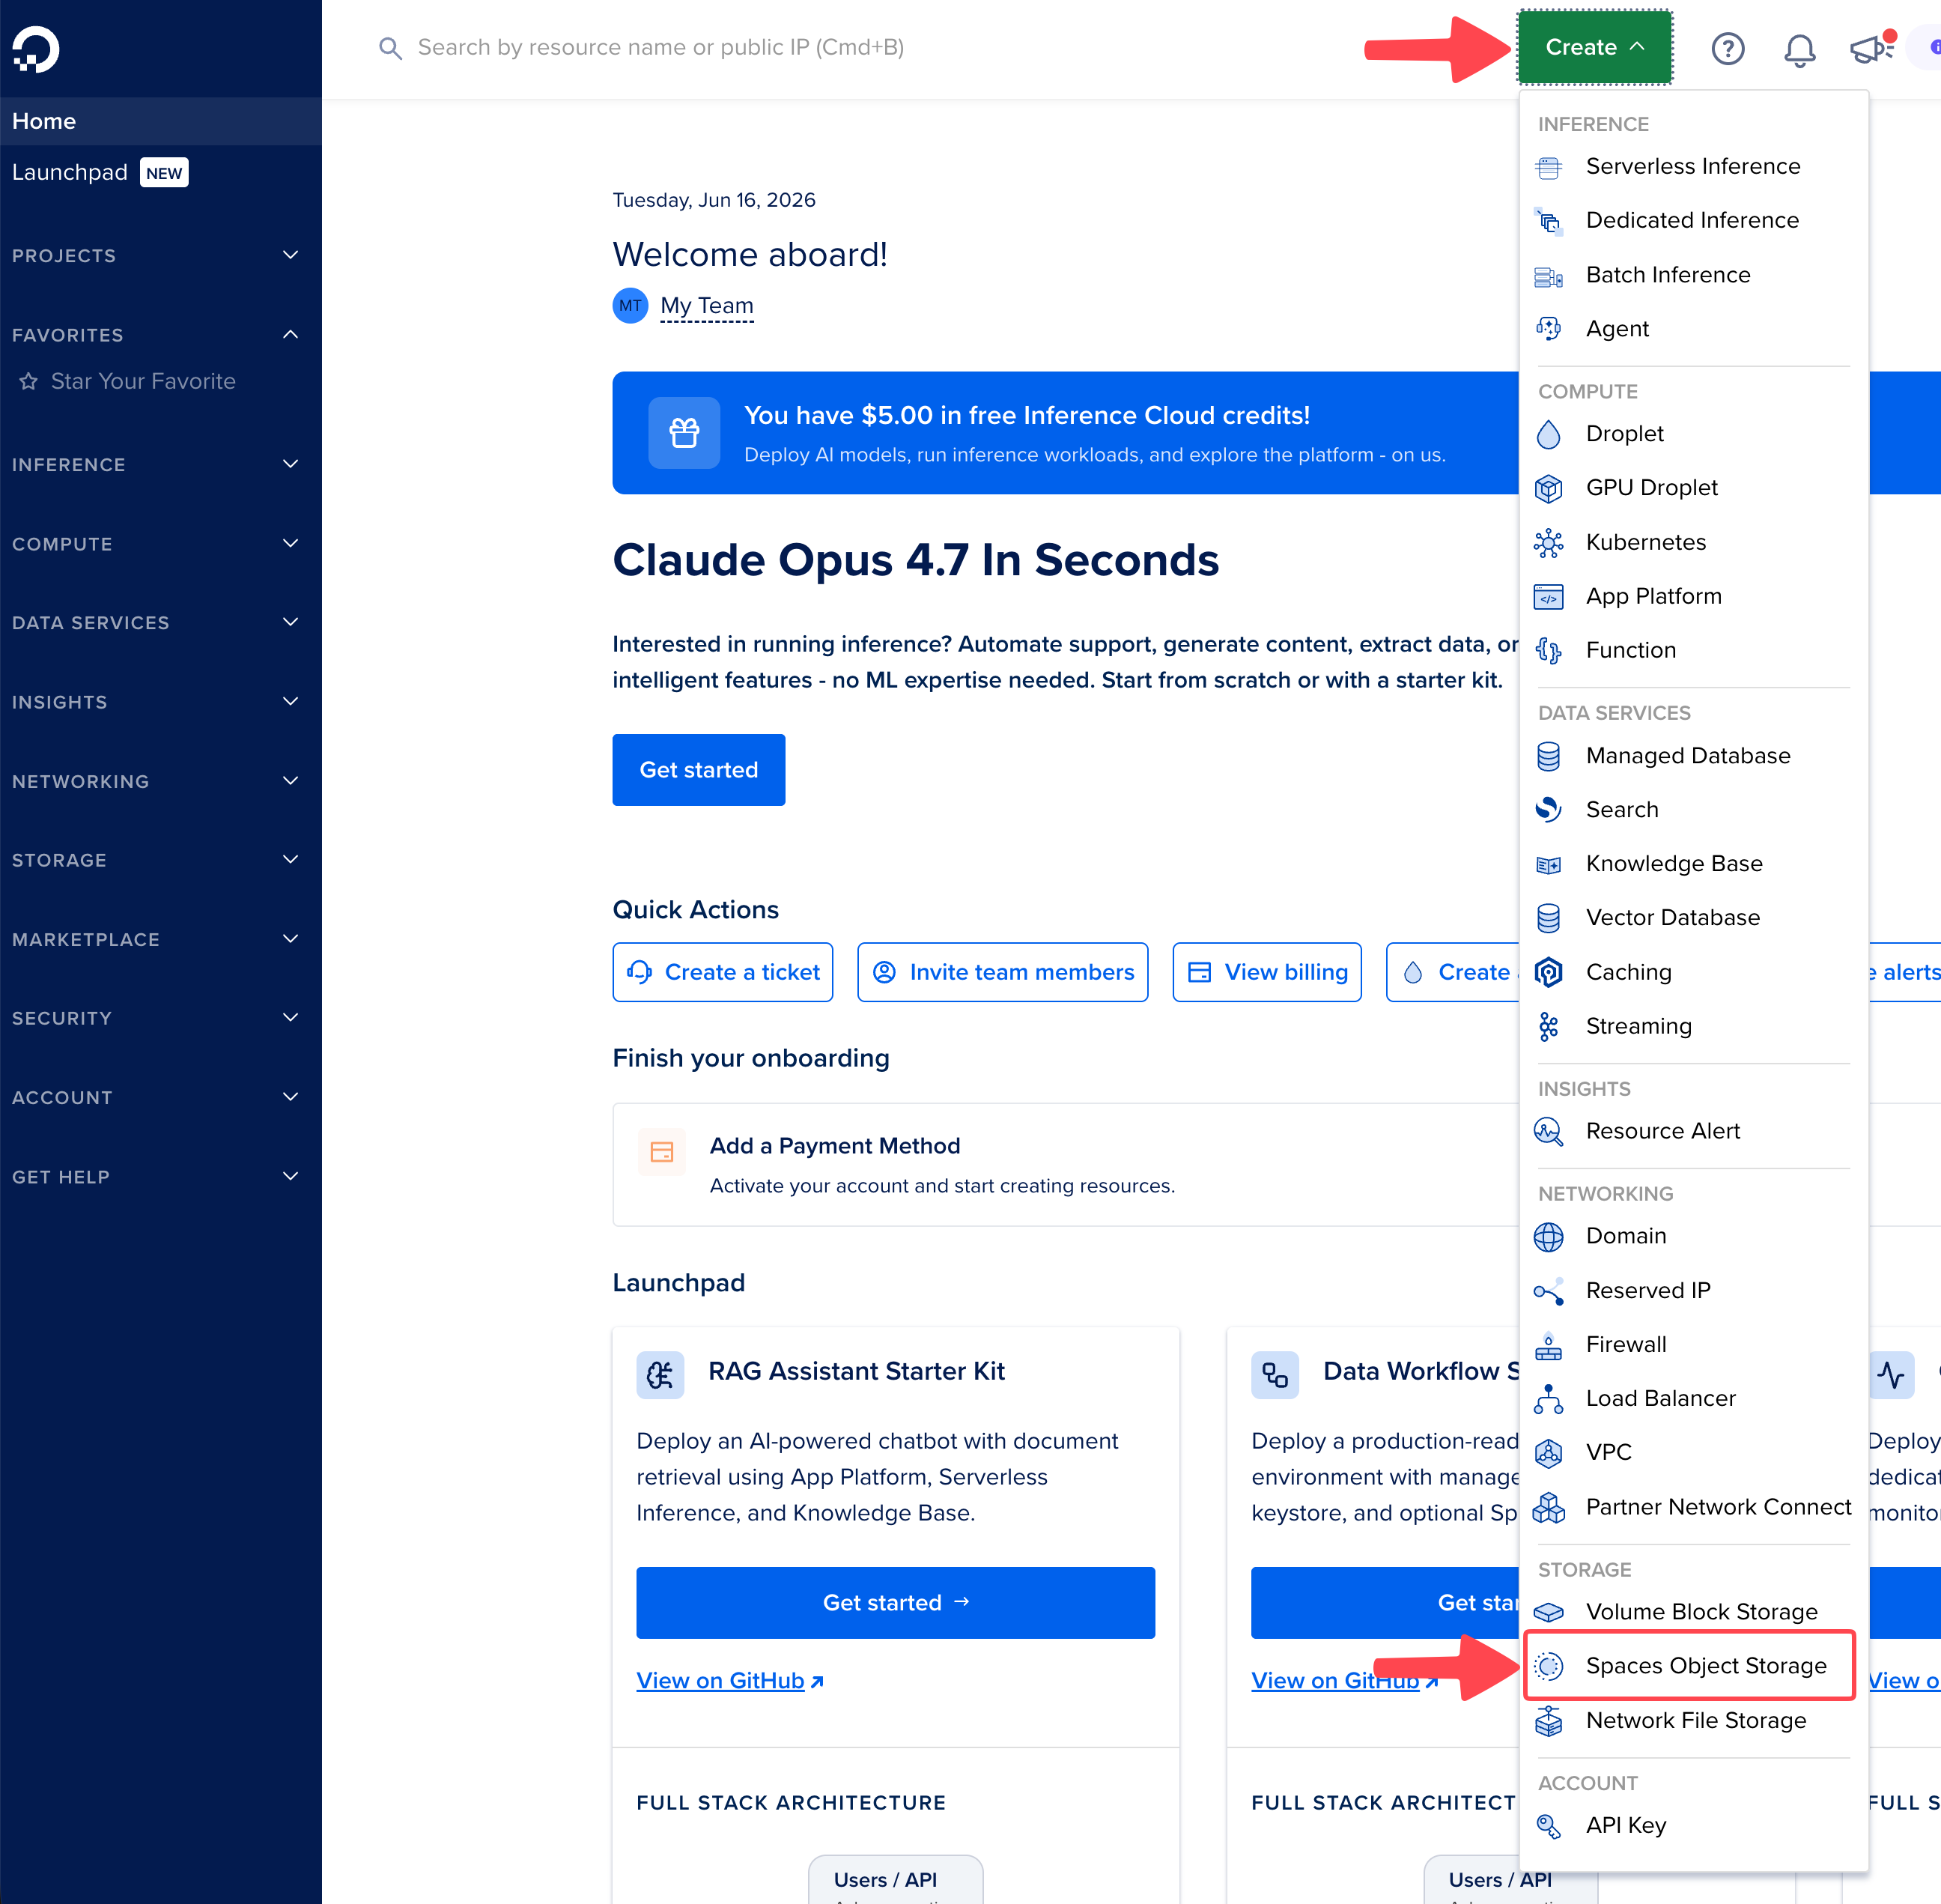
1) Sign up at https://cloud.digitalocean.com/ and create a new Spaces bucket. In the top bar, click Create and, under the STORAGE column, choose Spaces Object Storage.
2) Leave Standard Storage selected (CDN support, no minimum retention period). Further down the page, select a region and enter a bucket name, then click Create a Spaces Bucket.
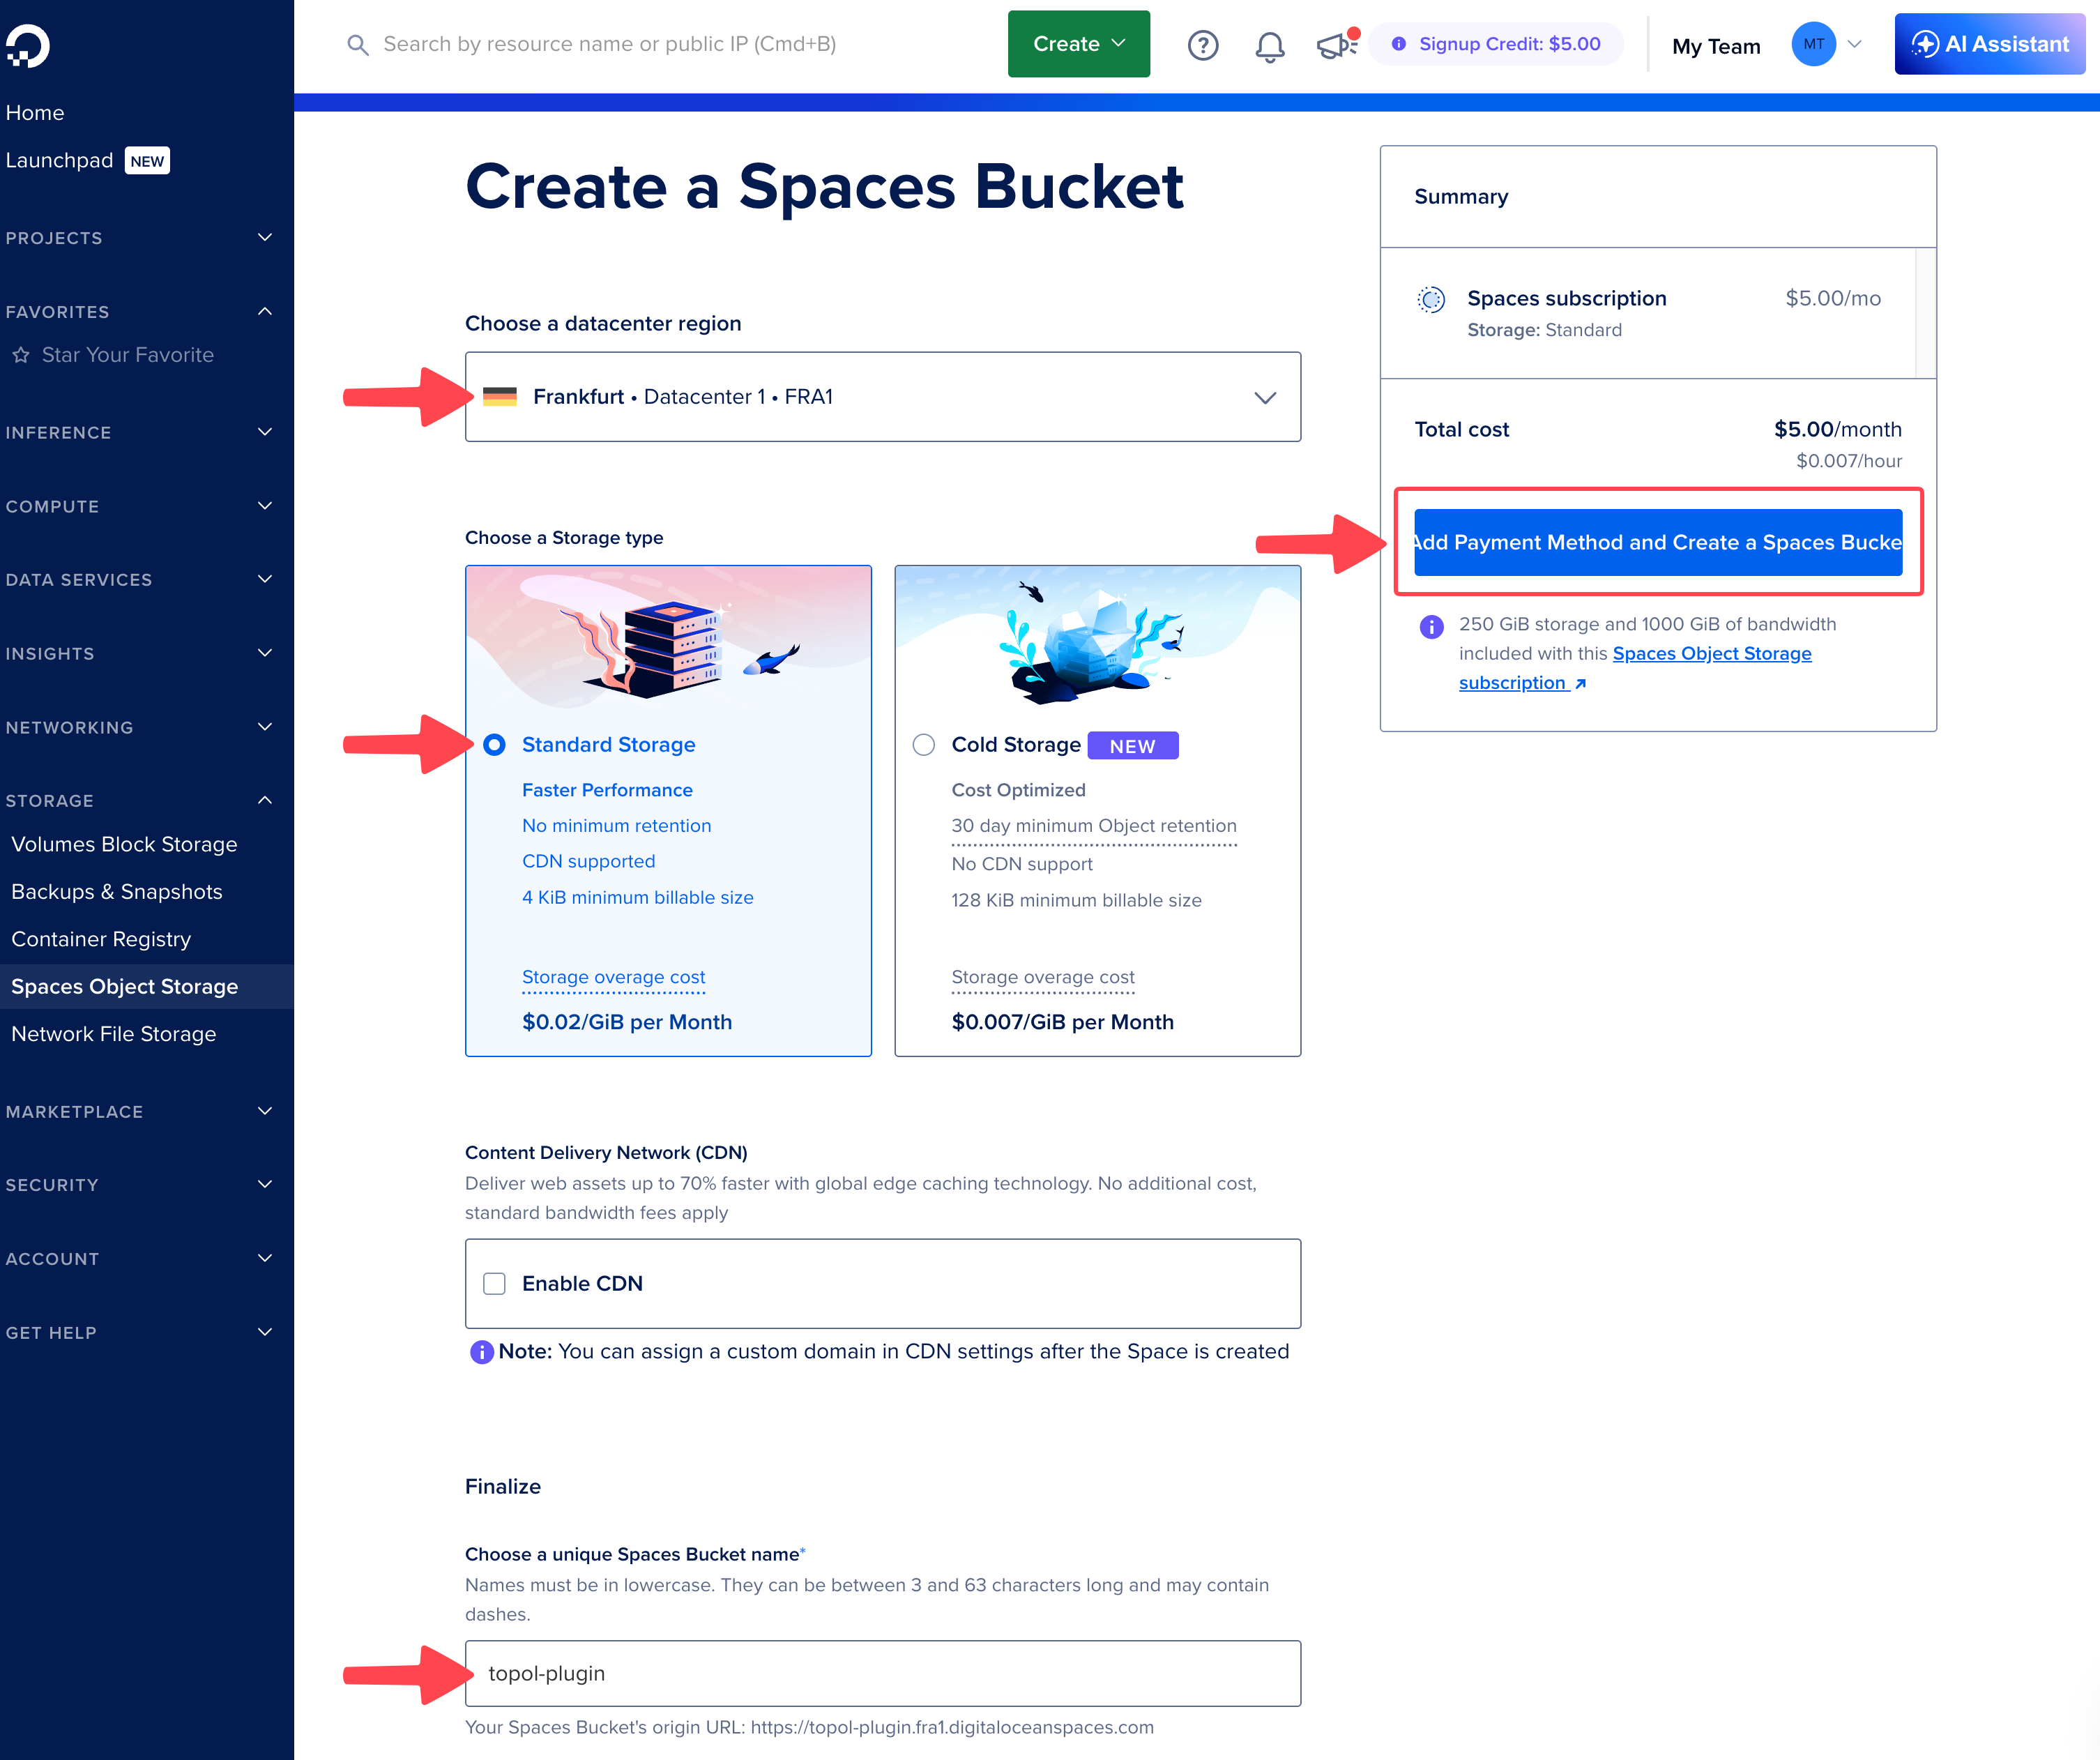
In this example the bucket is named topol-plugin and the region is fra1. Save your own values for the final step.
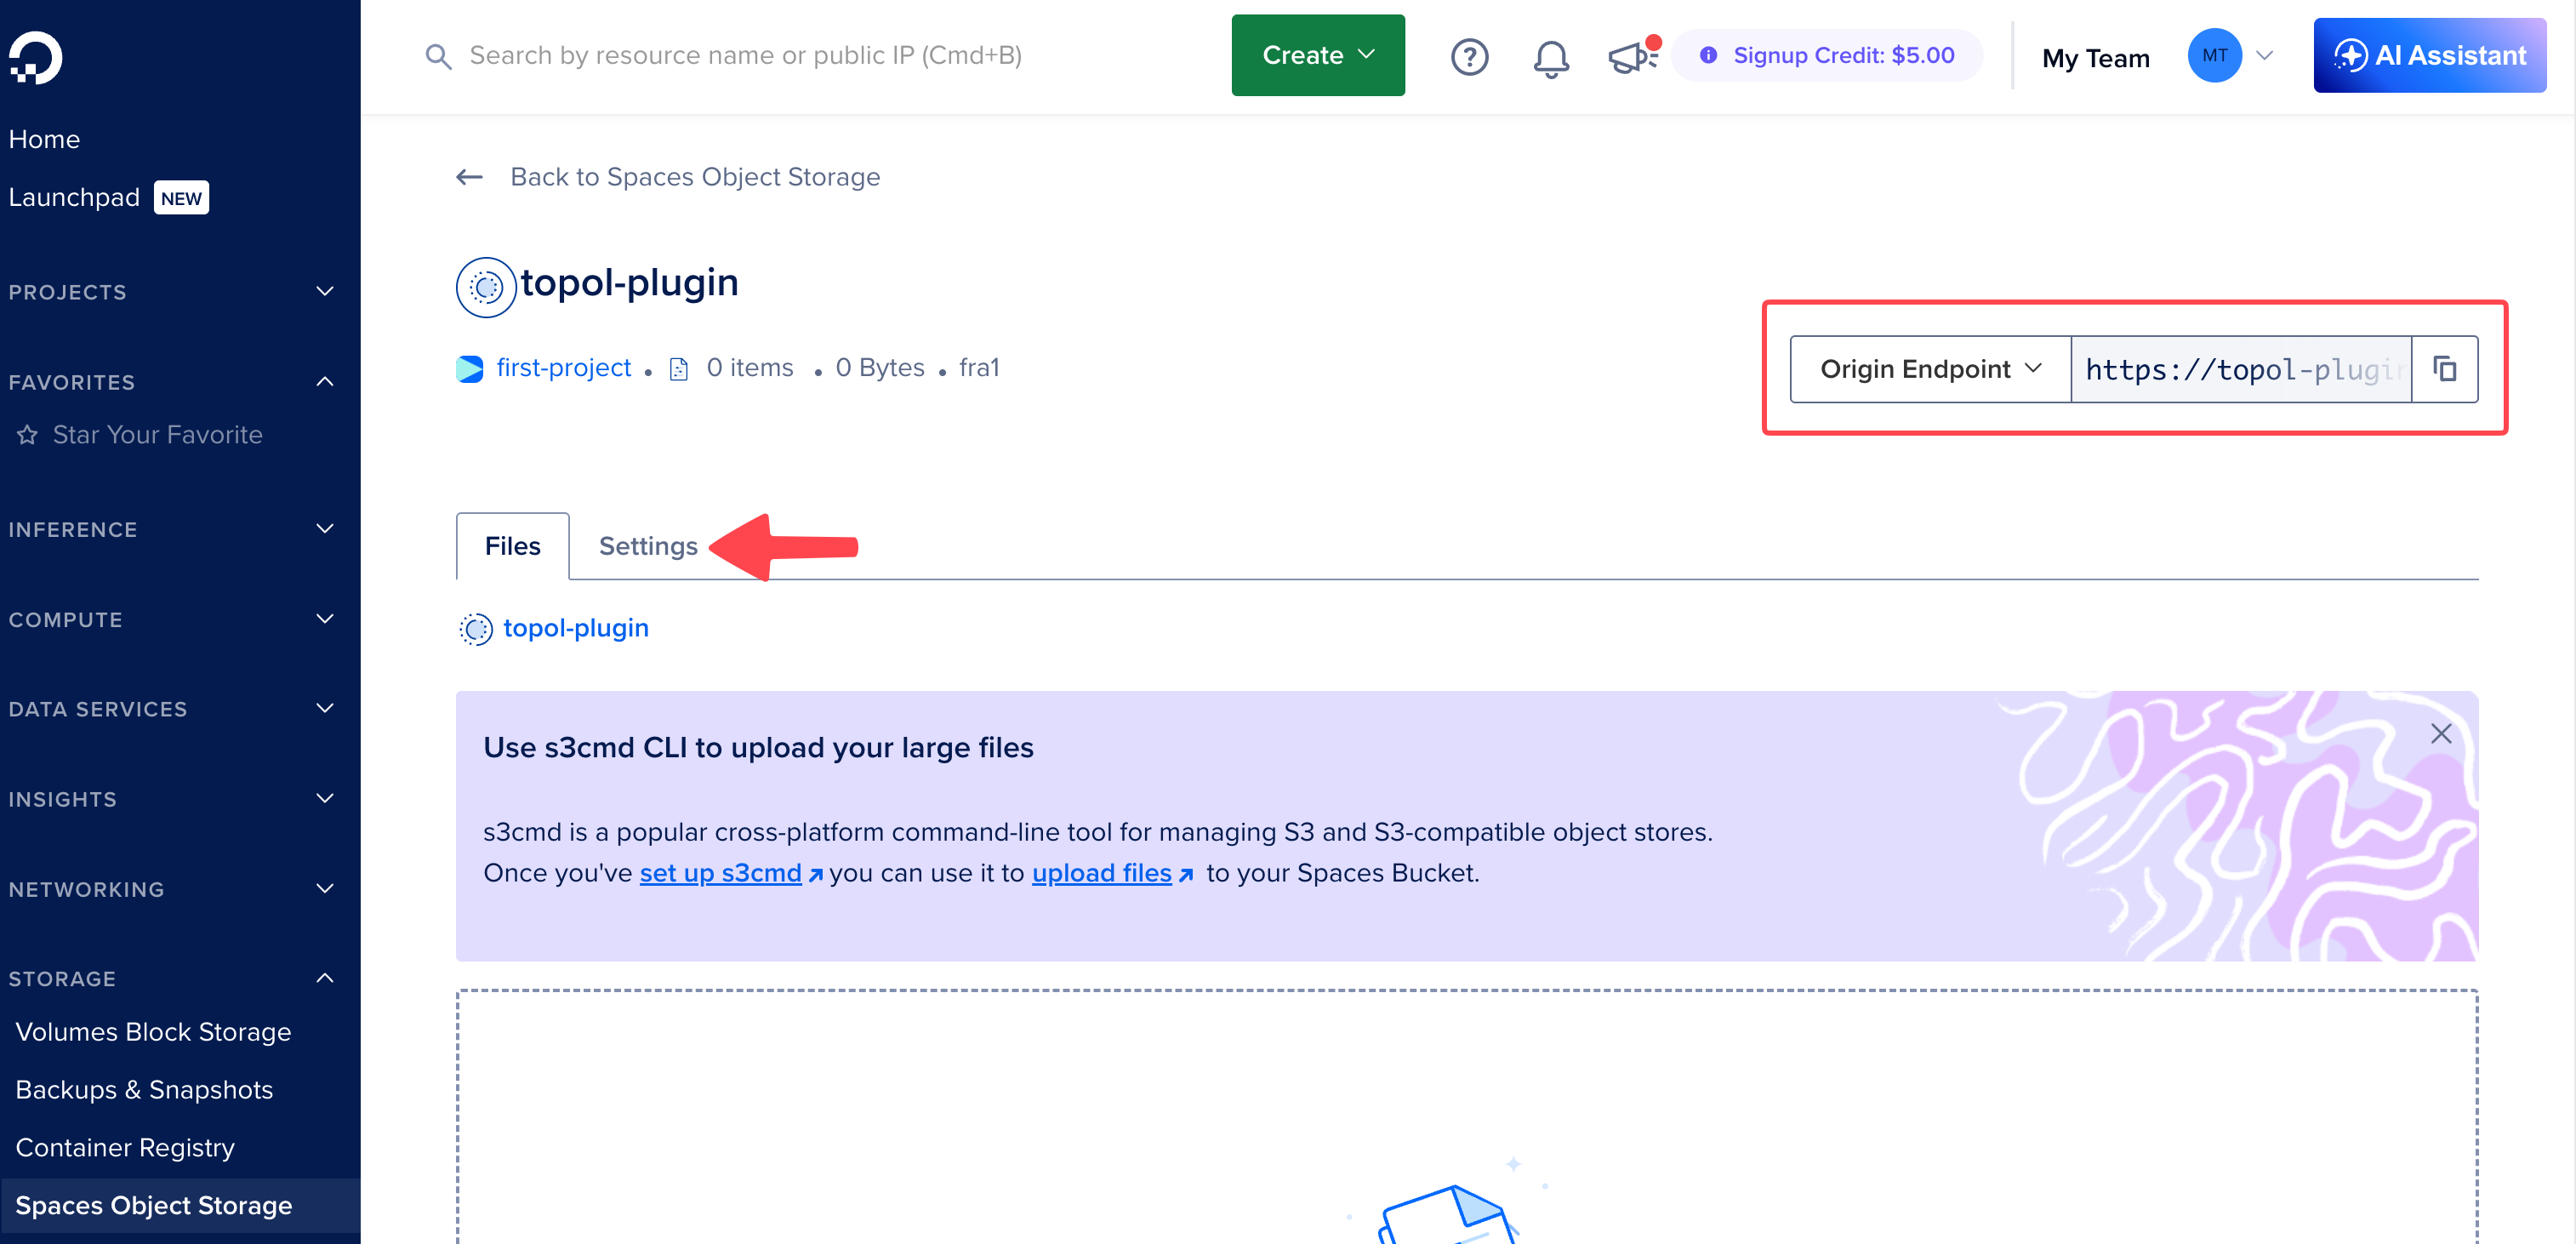
3) After it is created, the bucket detail opens with the Files and Settings tabs. In the top-right corner there is an Origin Endpoint field showing your storage address. Click Settings.
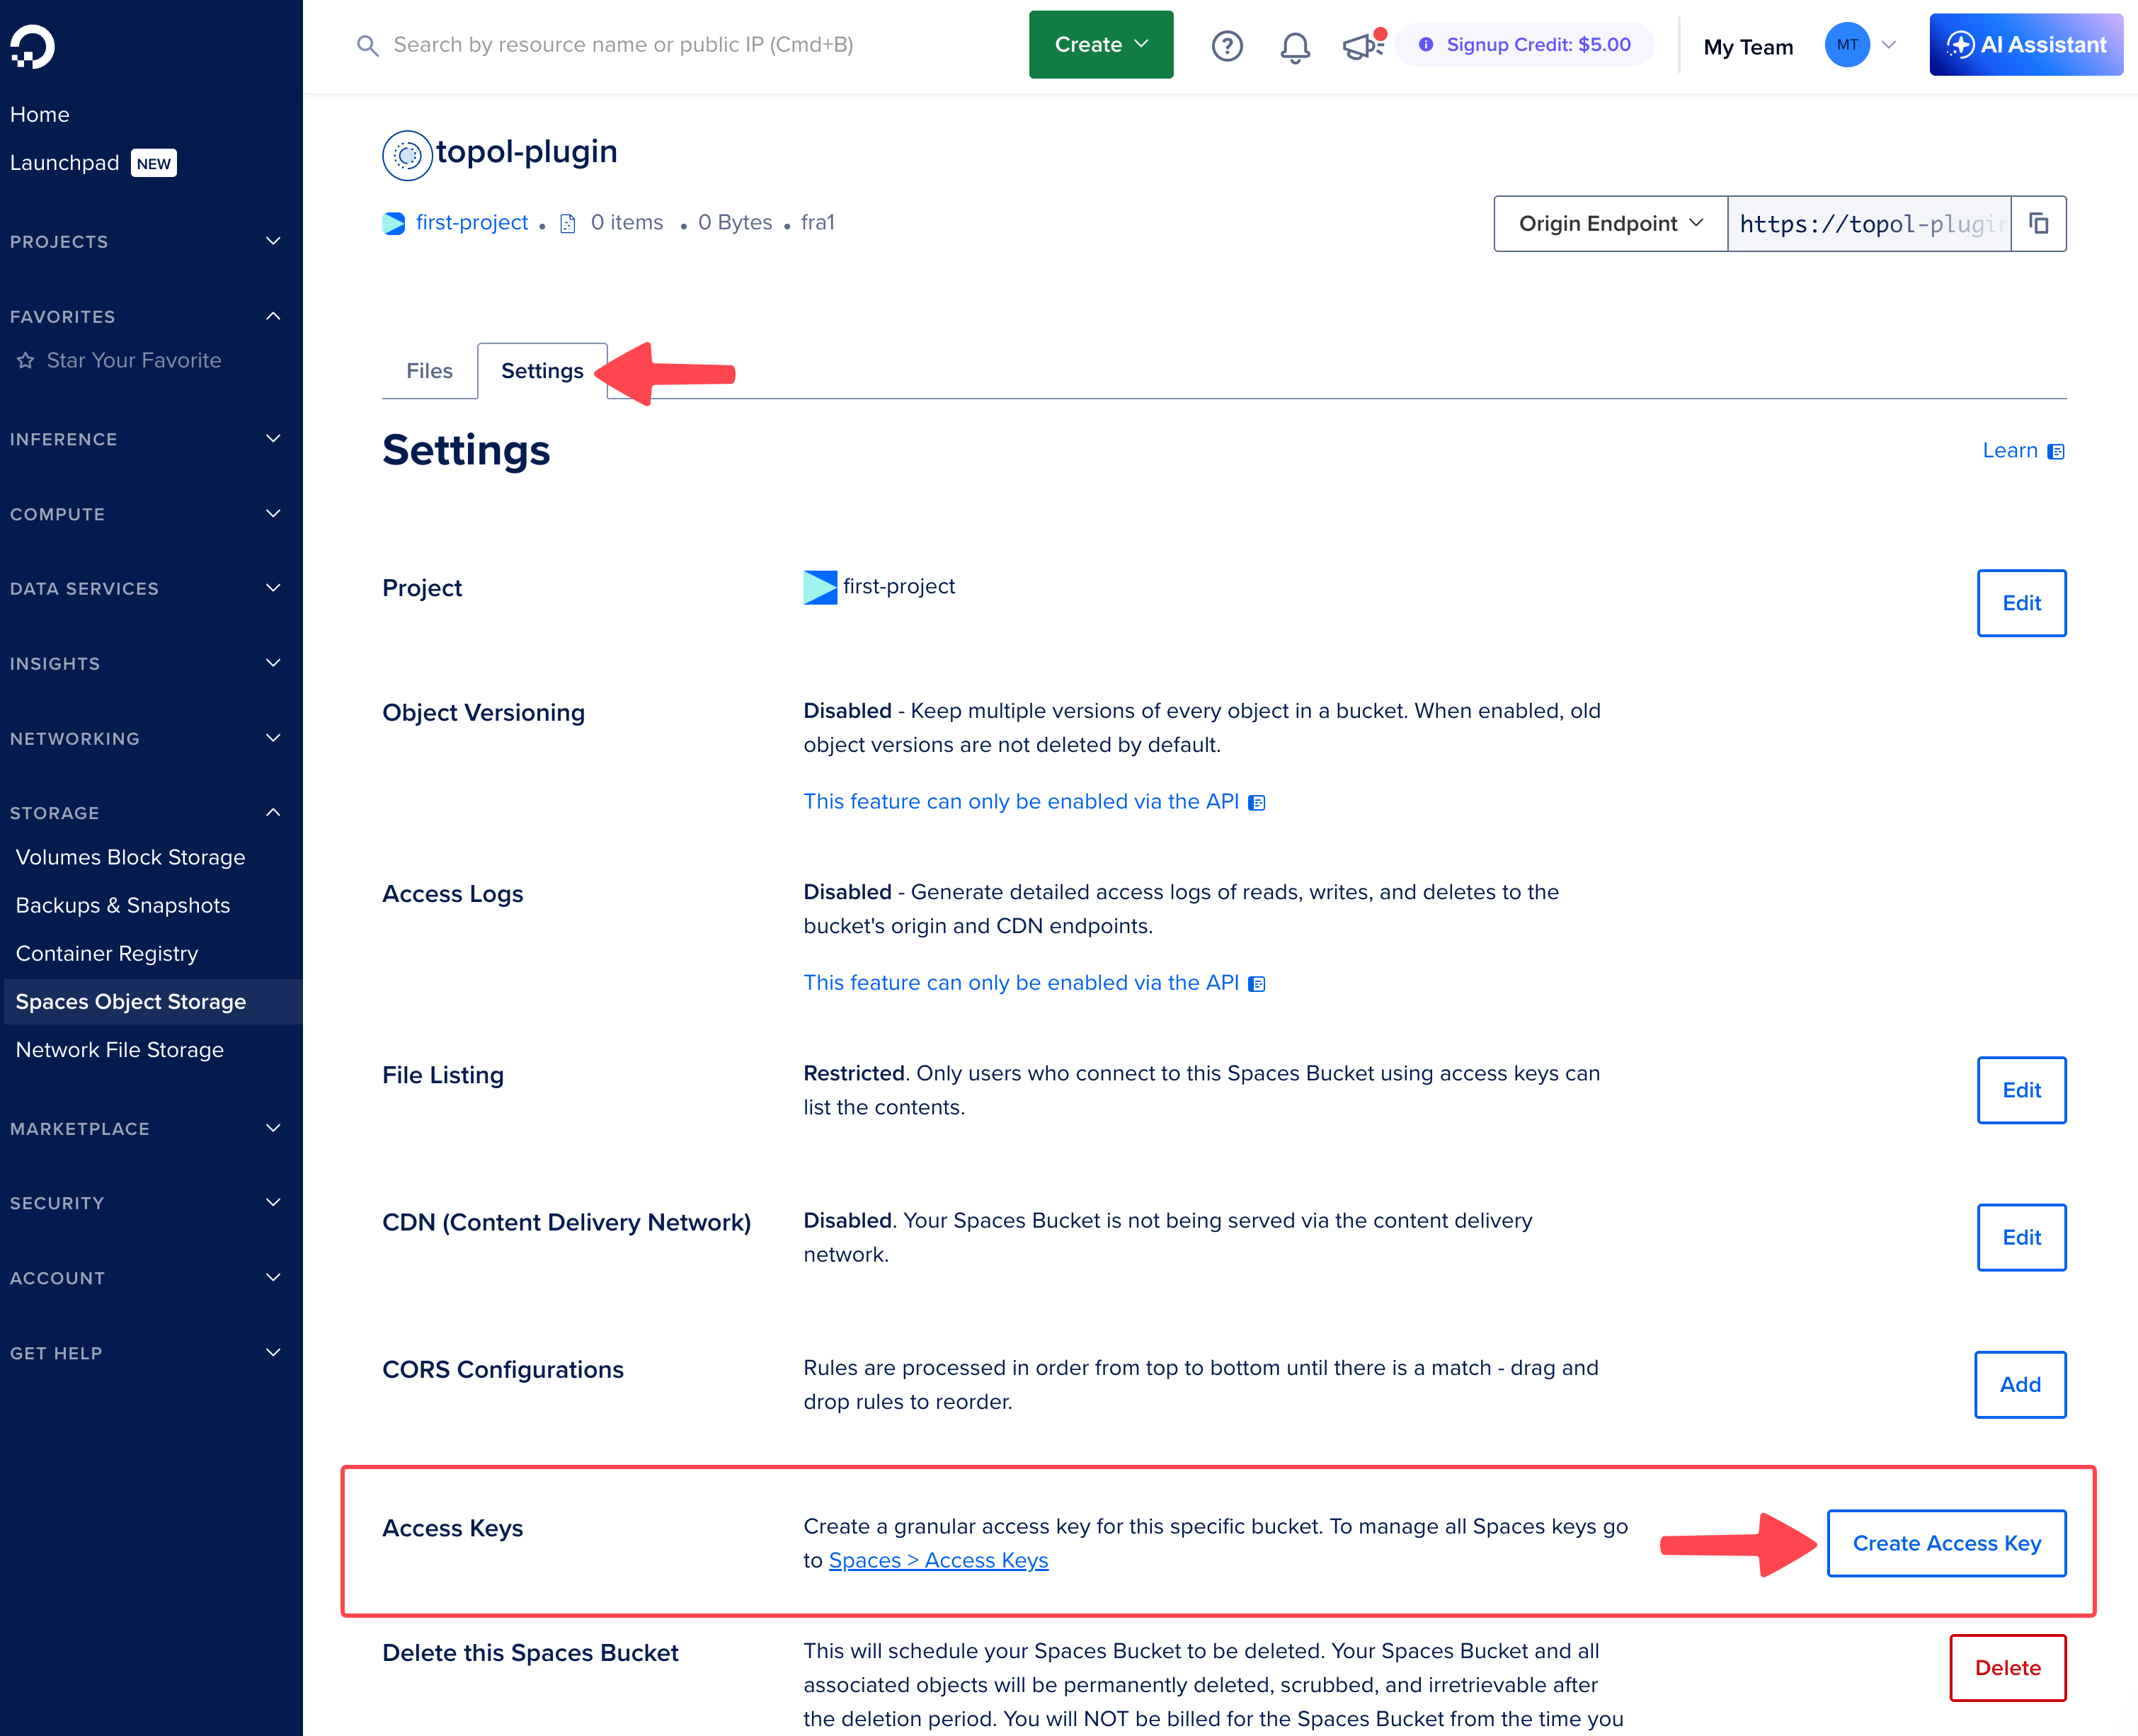
4) In Settings, scroll down to the Access Keys section and click Create Access Key.
5) In the modal window that appears, select this bucket and switch its permissions from Read to Read/Write/Delete. Then click Create Access Key.
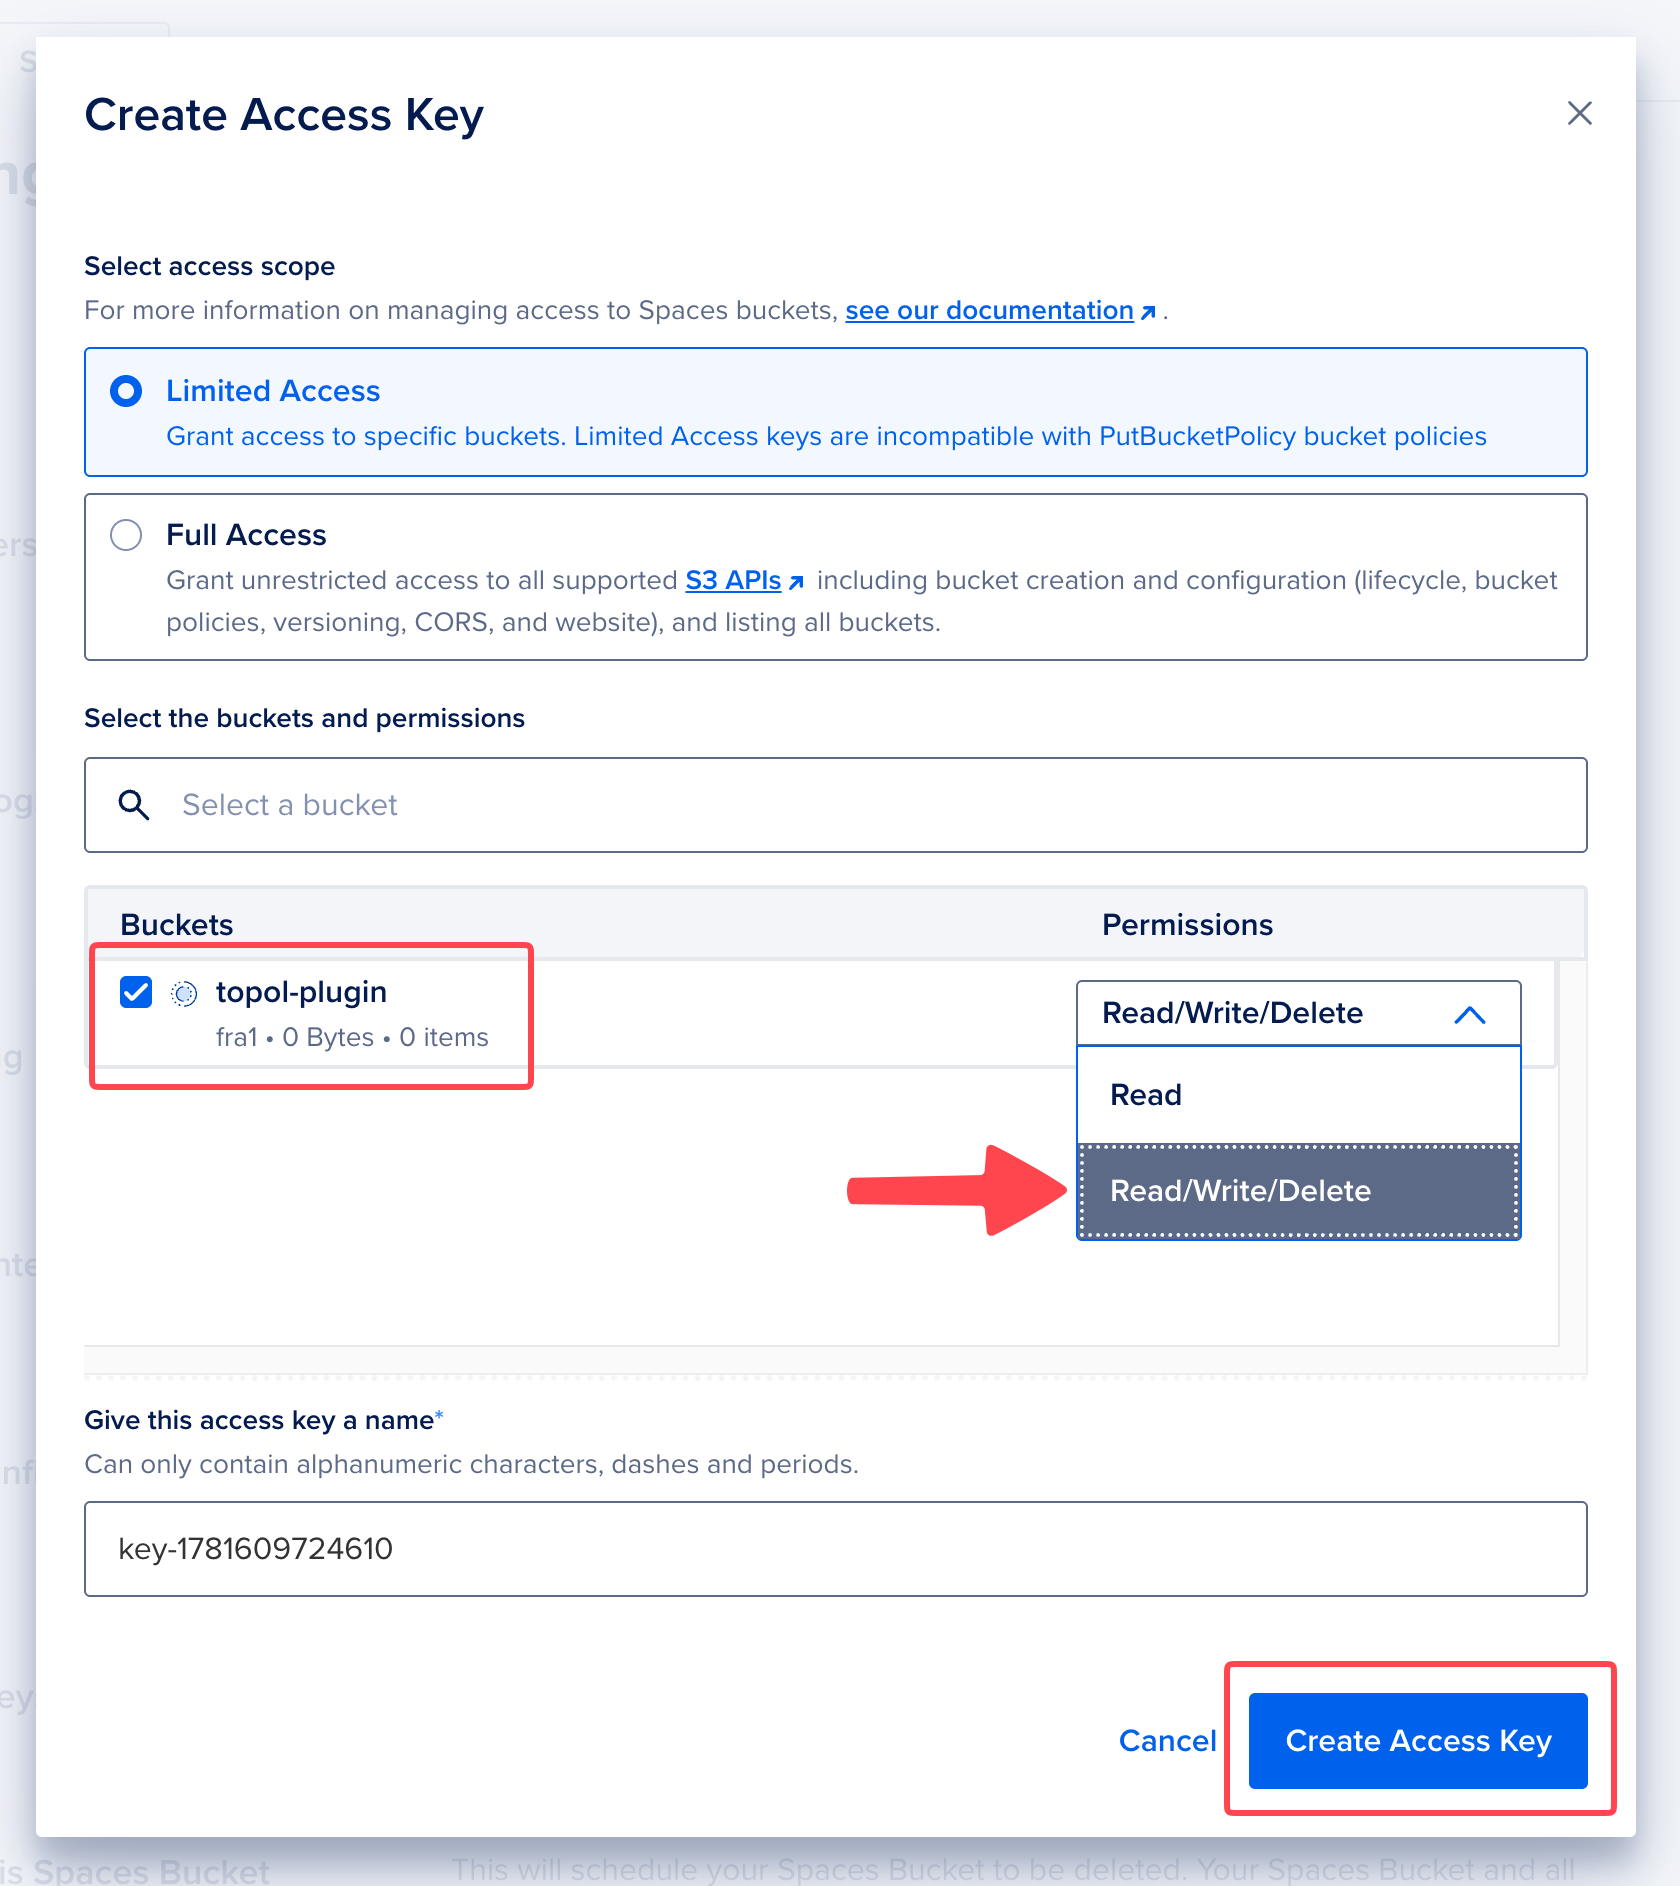
The plugin needs to write and delete files as well, so Read/Write/Delete is required. Read alone is not enough.
6) The key is created and displayed. Copy the Access Key ID and the Secret Key, and save both somewhere safe.
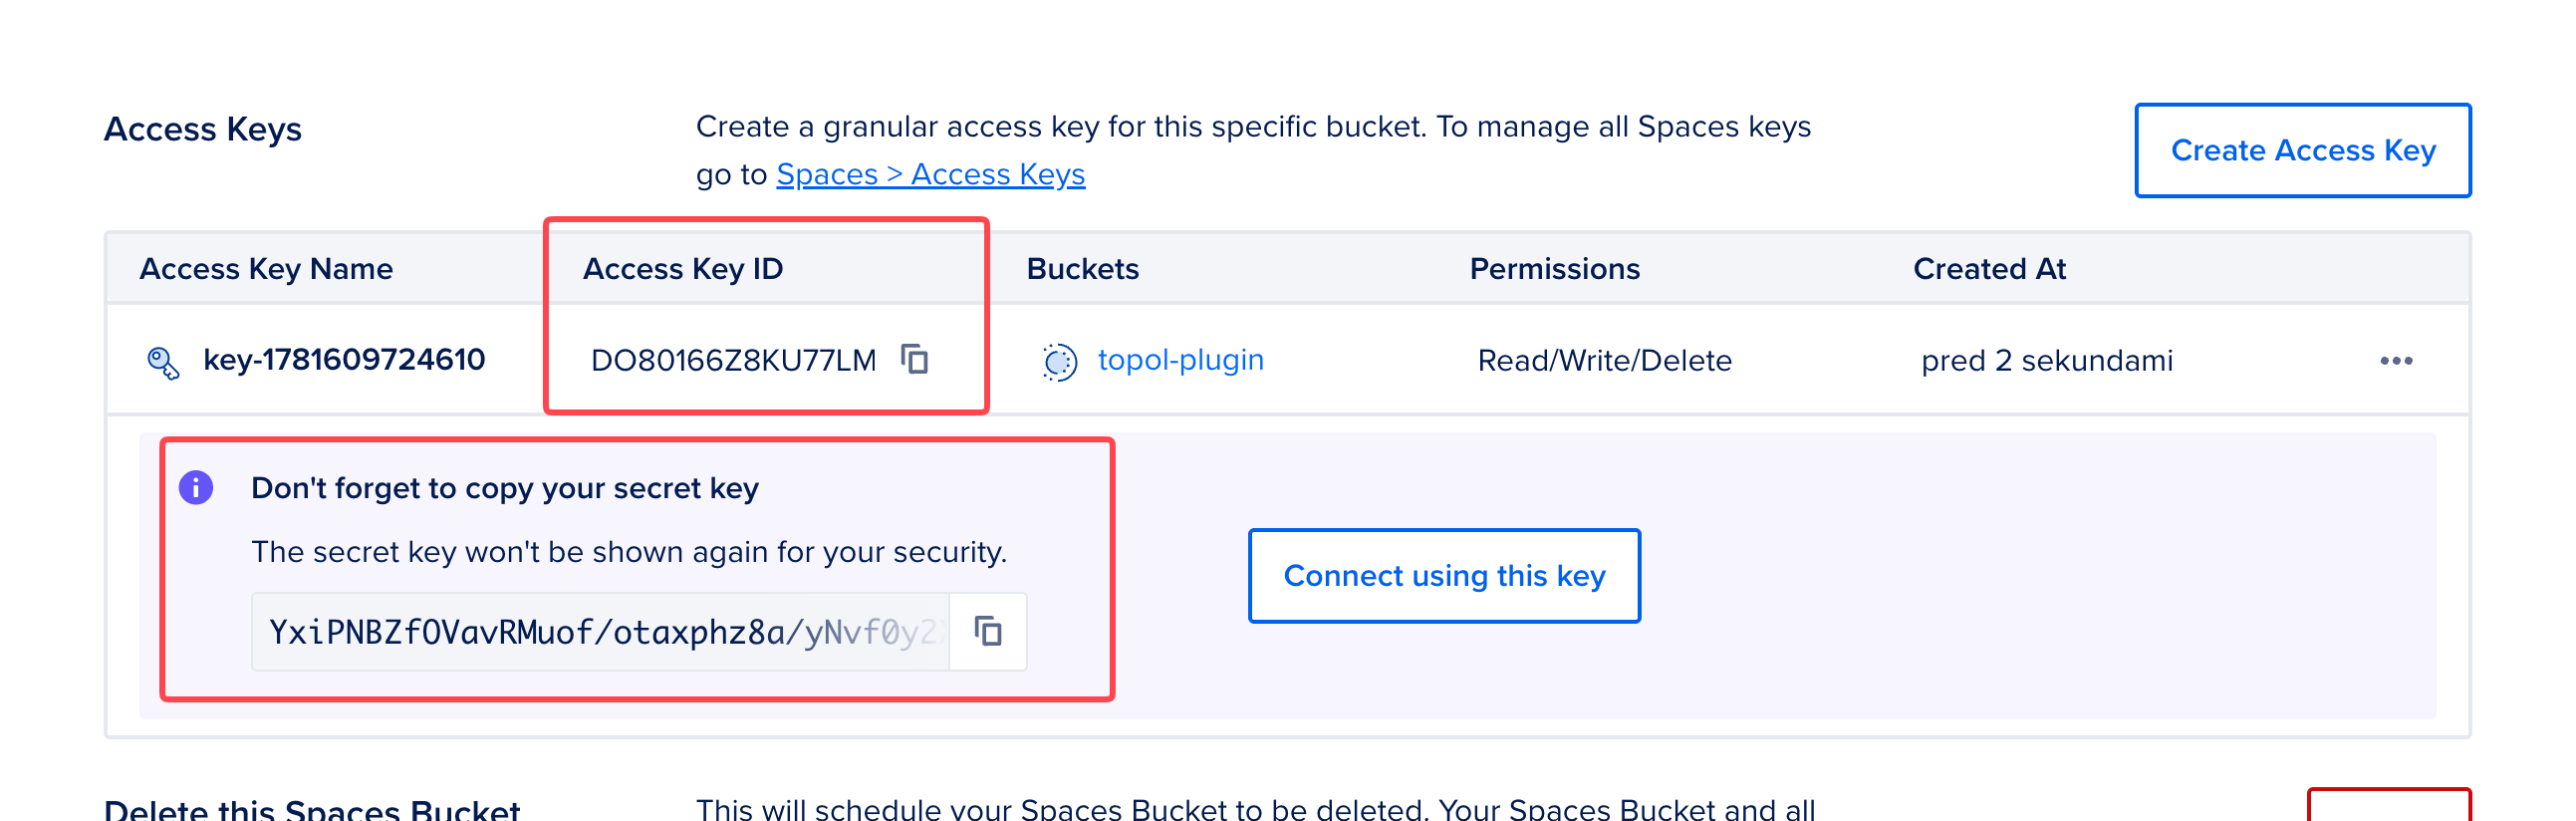
The Secret Key is shown only once. After the window is closed it cannot be viewed again; the only option is to regenerate the key (Regenerate key). Save it right away.
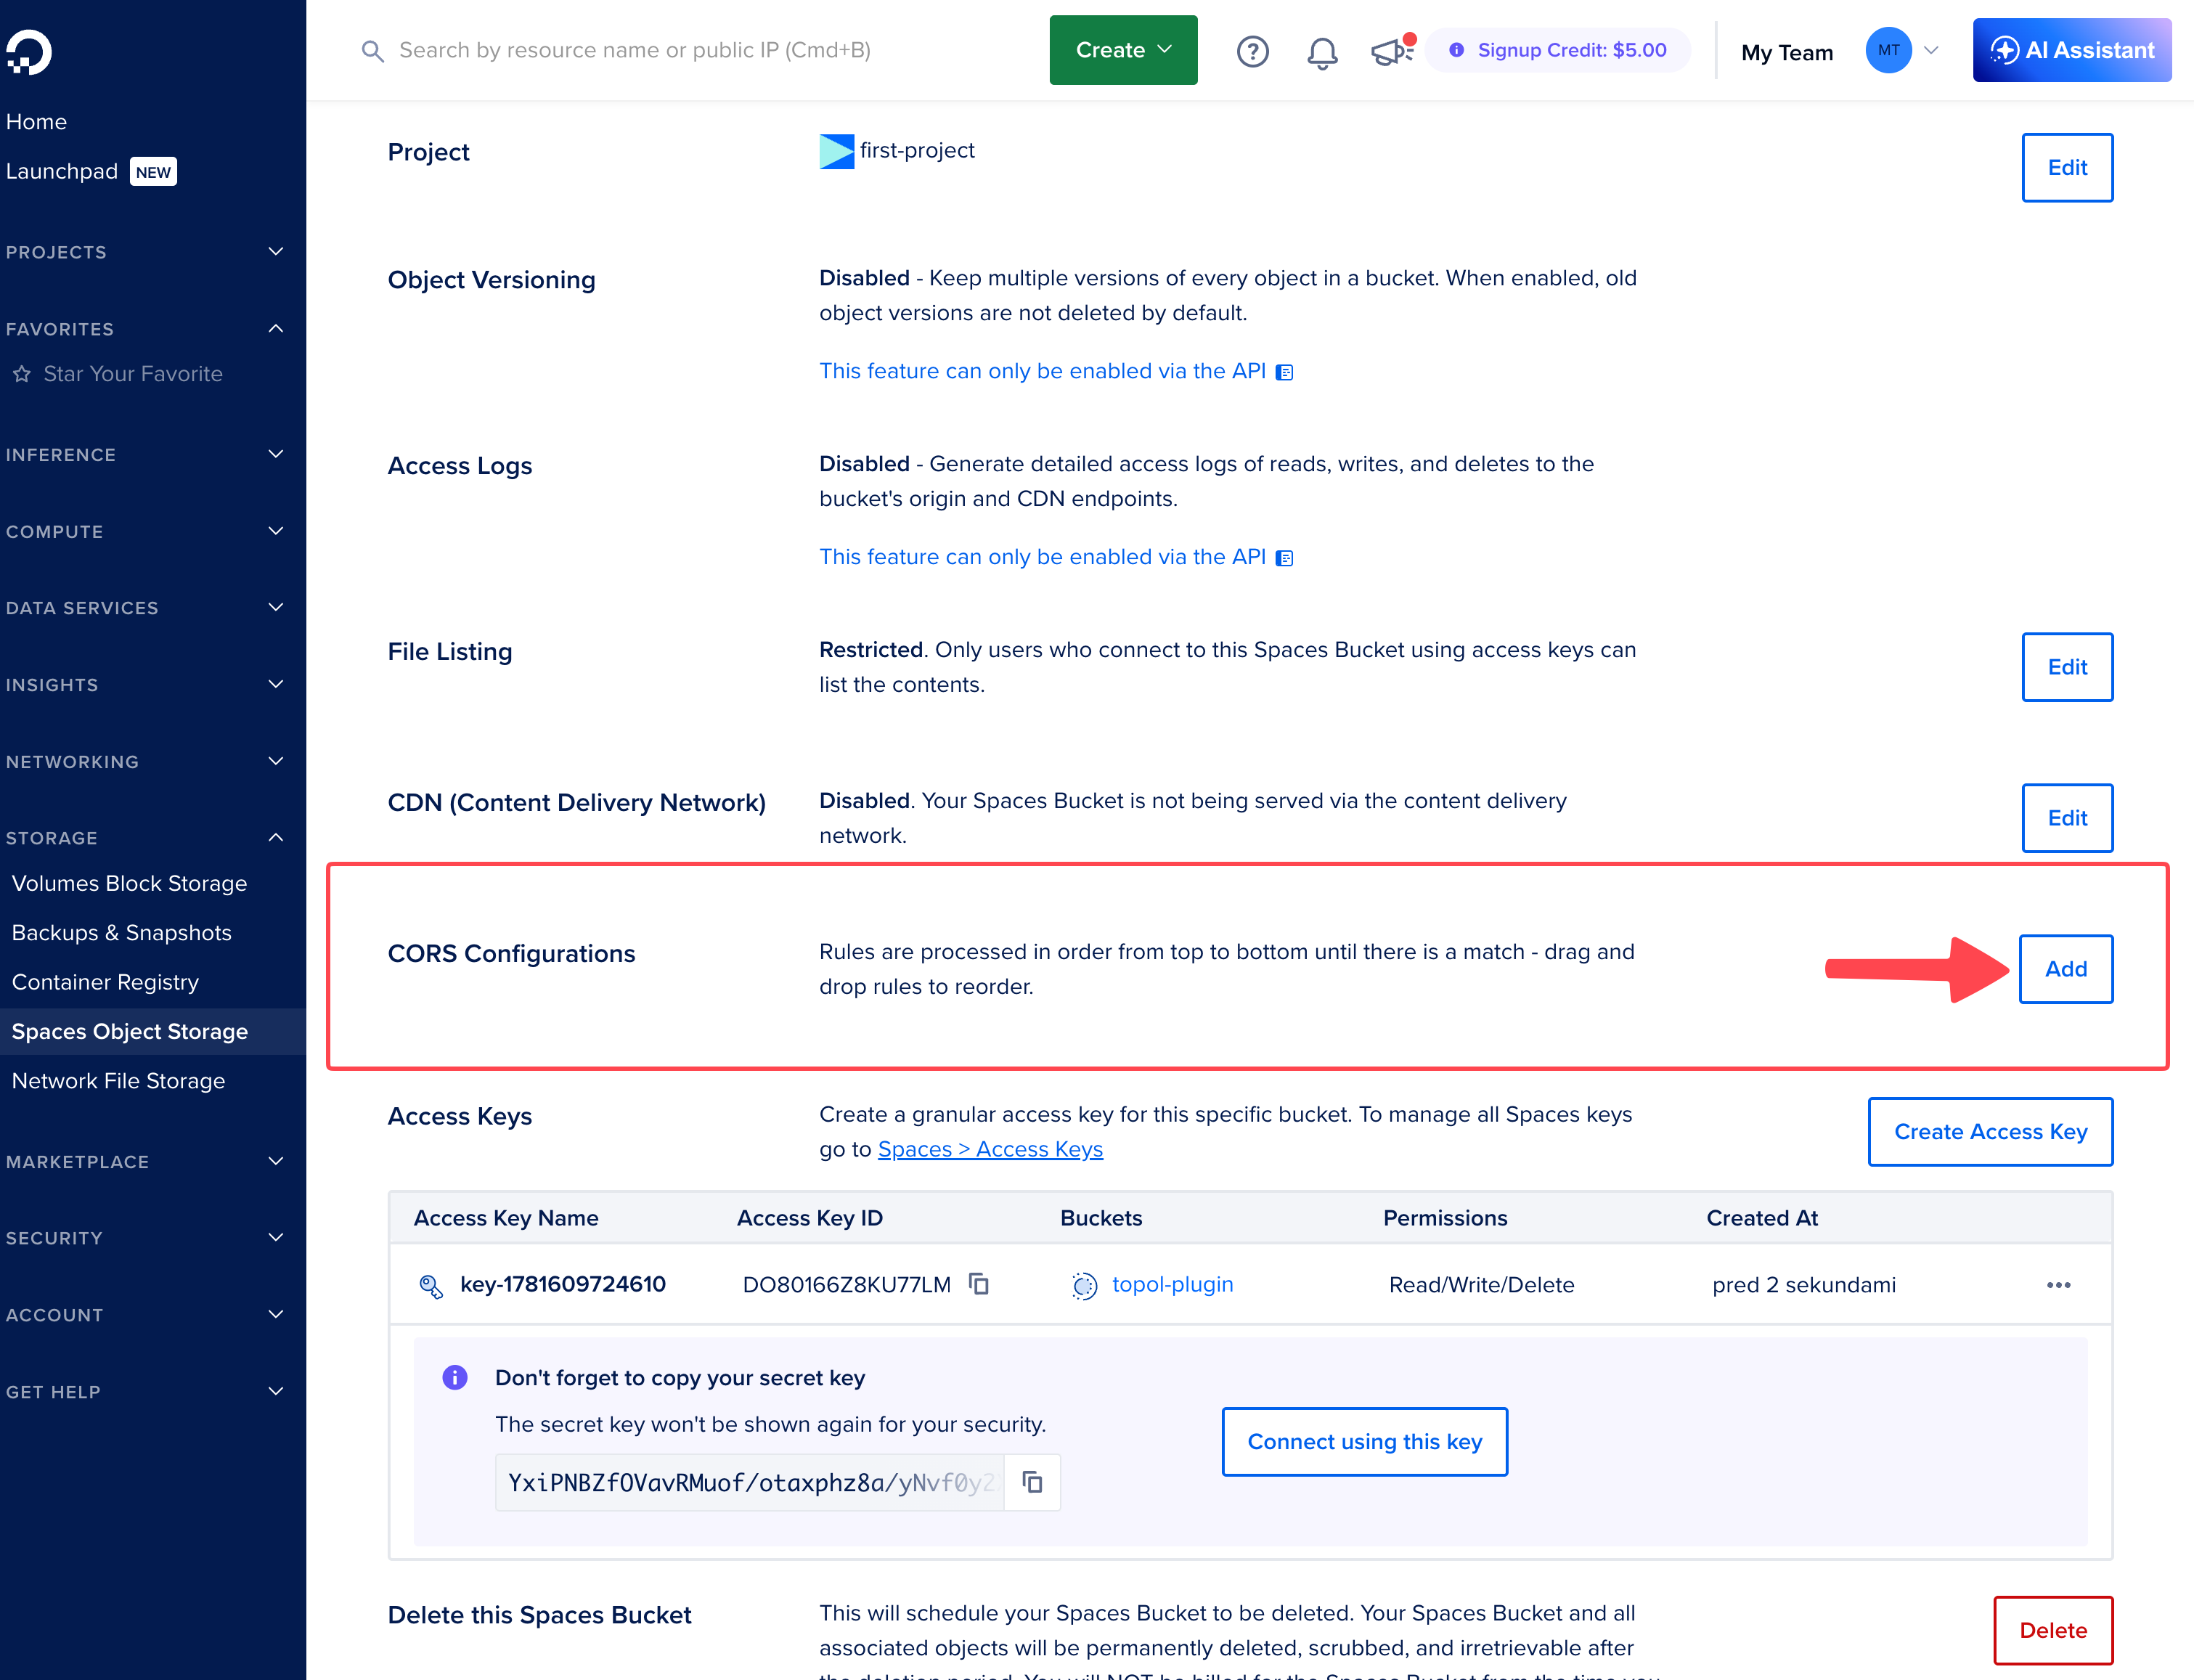
7) Go back to Settings and, next to the CORS Configurations section, click Add.
8) In the Advanced CORS Options window, fill in a single rule:
- Origin: enter one of the URLs from the table below.
- Allowed Methods: tick GET, PUT, and HEAD.
- Allowed Headers: click + Add Header and add one header with the wildcard
*. - Access Control Max Age: enter
3600.
Then save it with Save CORS Configuration.
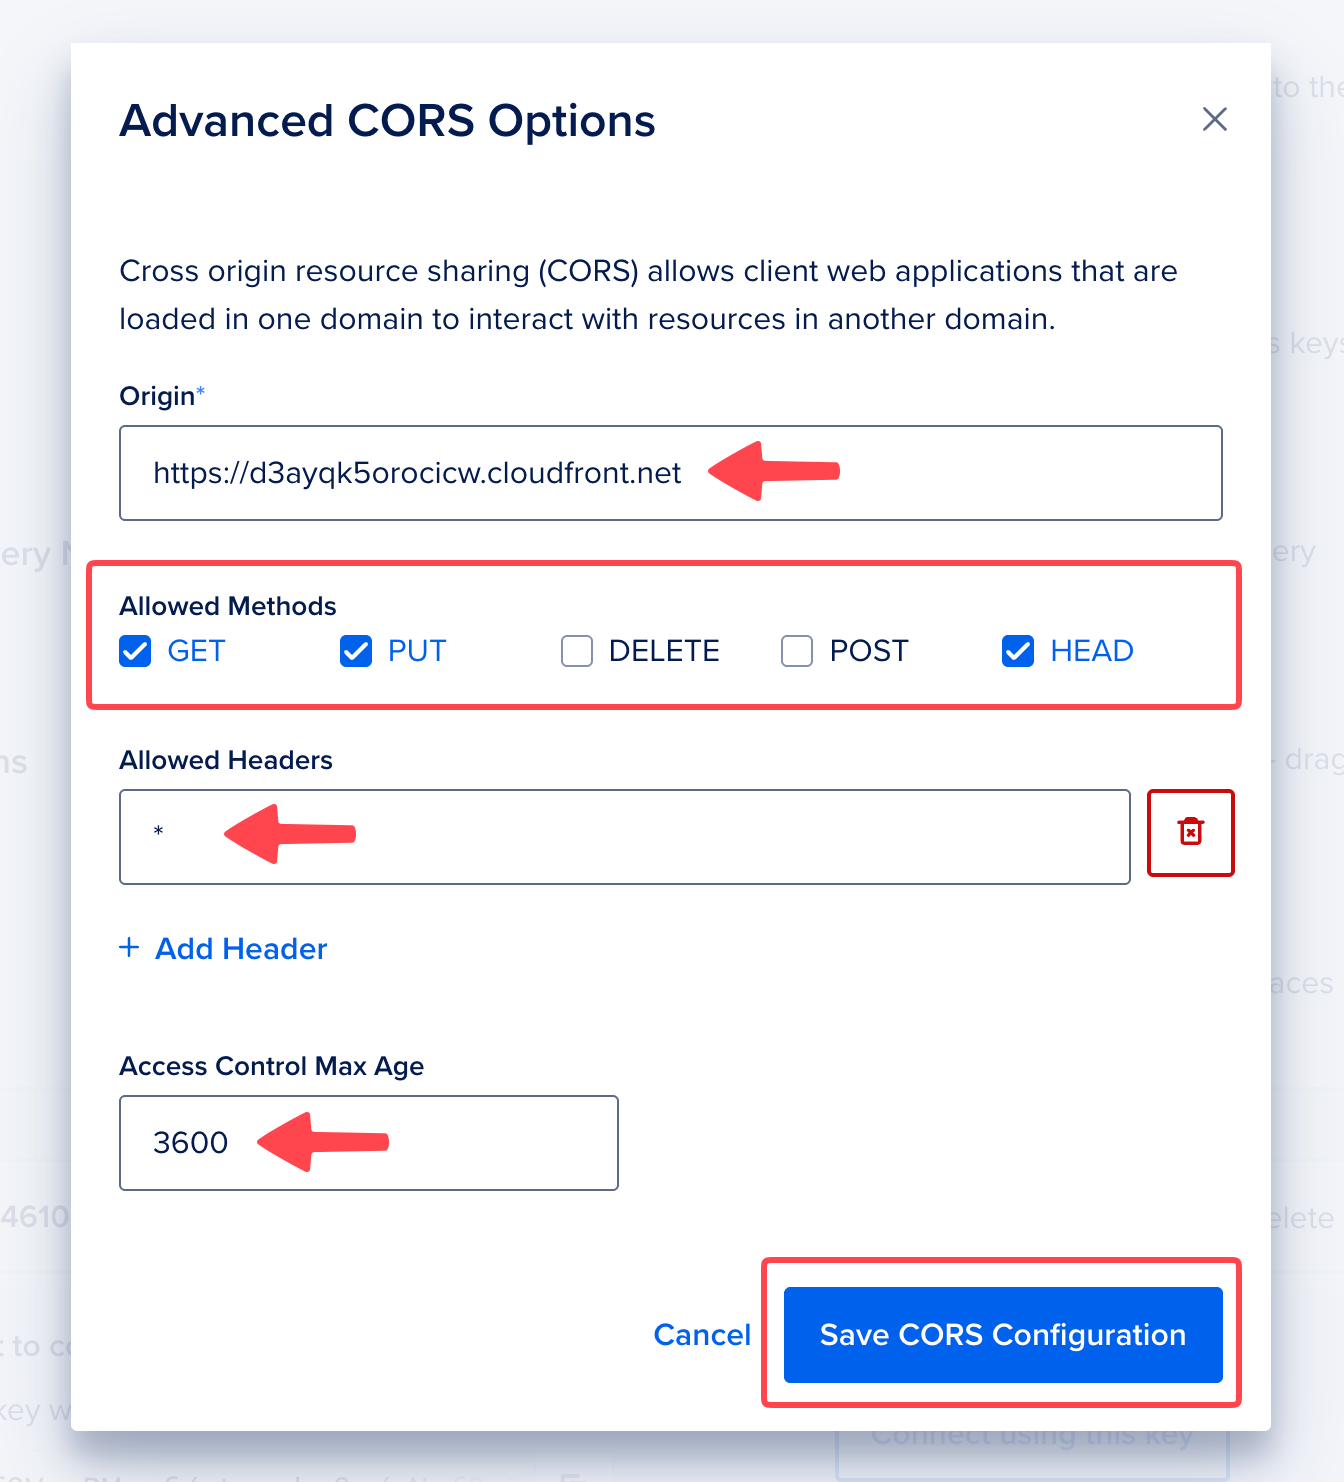
Add these three rules:
| # | Origin | Allowed Methods | Allowed Headers | Max Age |
|---|---|---|---|---|
| 1 | https://d3ayqk5orocicw.cloudfront.net | GET, PUT, HEAD | * | 3600 s |
| 2 | https://v4.email-assets.topol.io | GET, PUT, HEAD | * | 3600 s |
| 3 | https://v3.email-assets.topol.io | GET, PUT, HEAD | * | 3600 s |
DigitalOcean adds only one origin per rule. Repeat the process three times: one rule for each address. The order of the rules can be changed by drag & drop.
9) The top of the bucket detail shows everything needed for the Topol setup:
- Name: next to the bucket icon.
- Region: in the metadata row (
fra1). - Origin Endpoint: in the field on the right; copy the address using the Copy button.
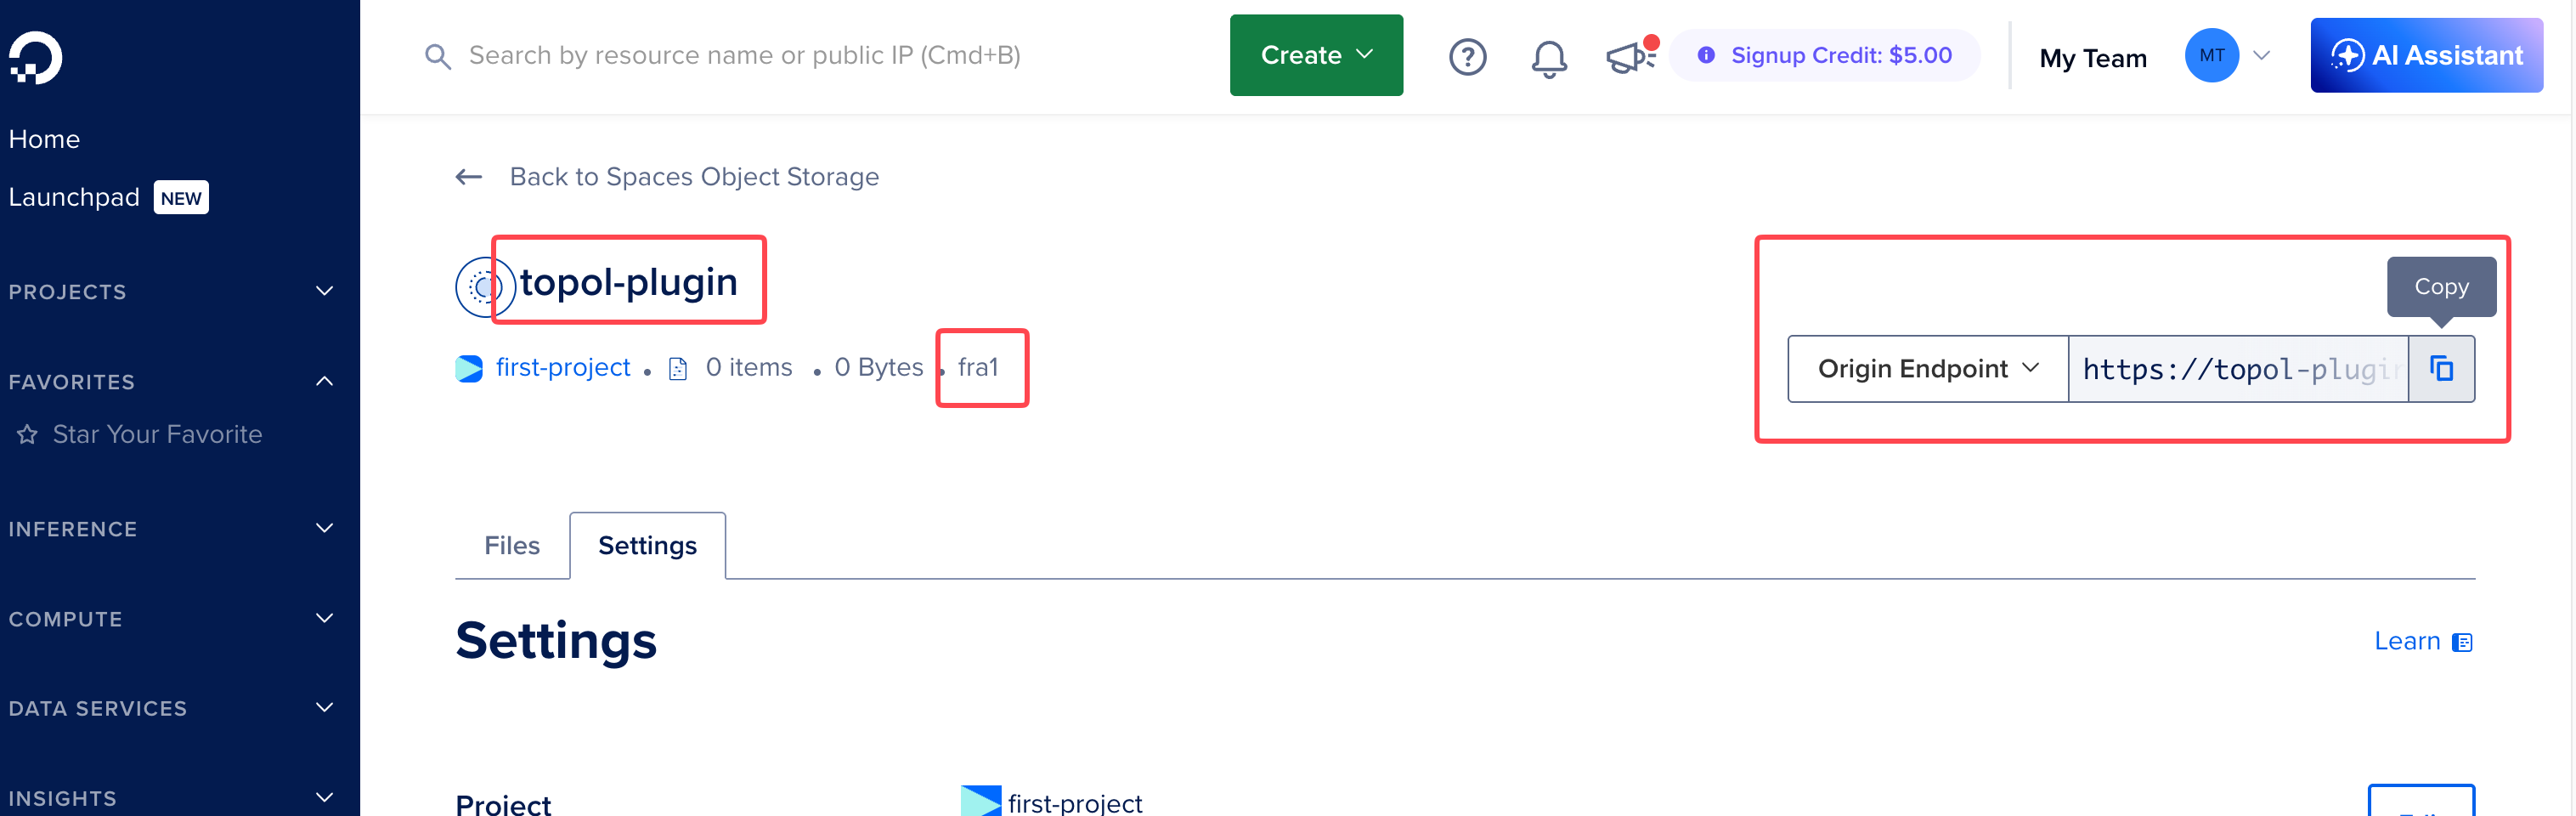
The Origin Endpoint has the form https://<bucket-name>.fra1.digitaloceanspaces.com.
Set your DigitalOcean Spaces credentials for the API Token in TOPOL
The remaining steps happen in the Topol app, using the values you saved above.
1) Log in to your Topol account at https://app.topol.io/. The API Tokens tab is selected by default.
2) Select the API Token where you want to set up your own DigitalOcean Spaces storage and switch to the Configuration tab.
3) In the Custom storage section, click Set up DigitalOcean Spaces storage.
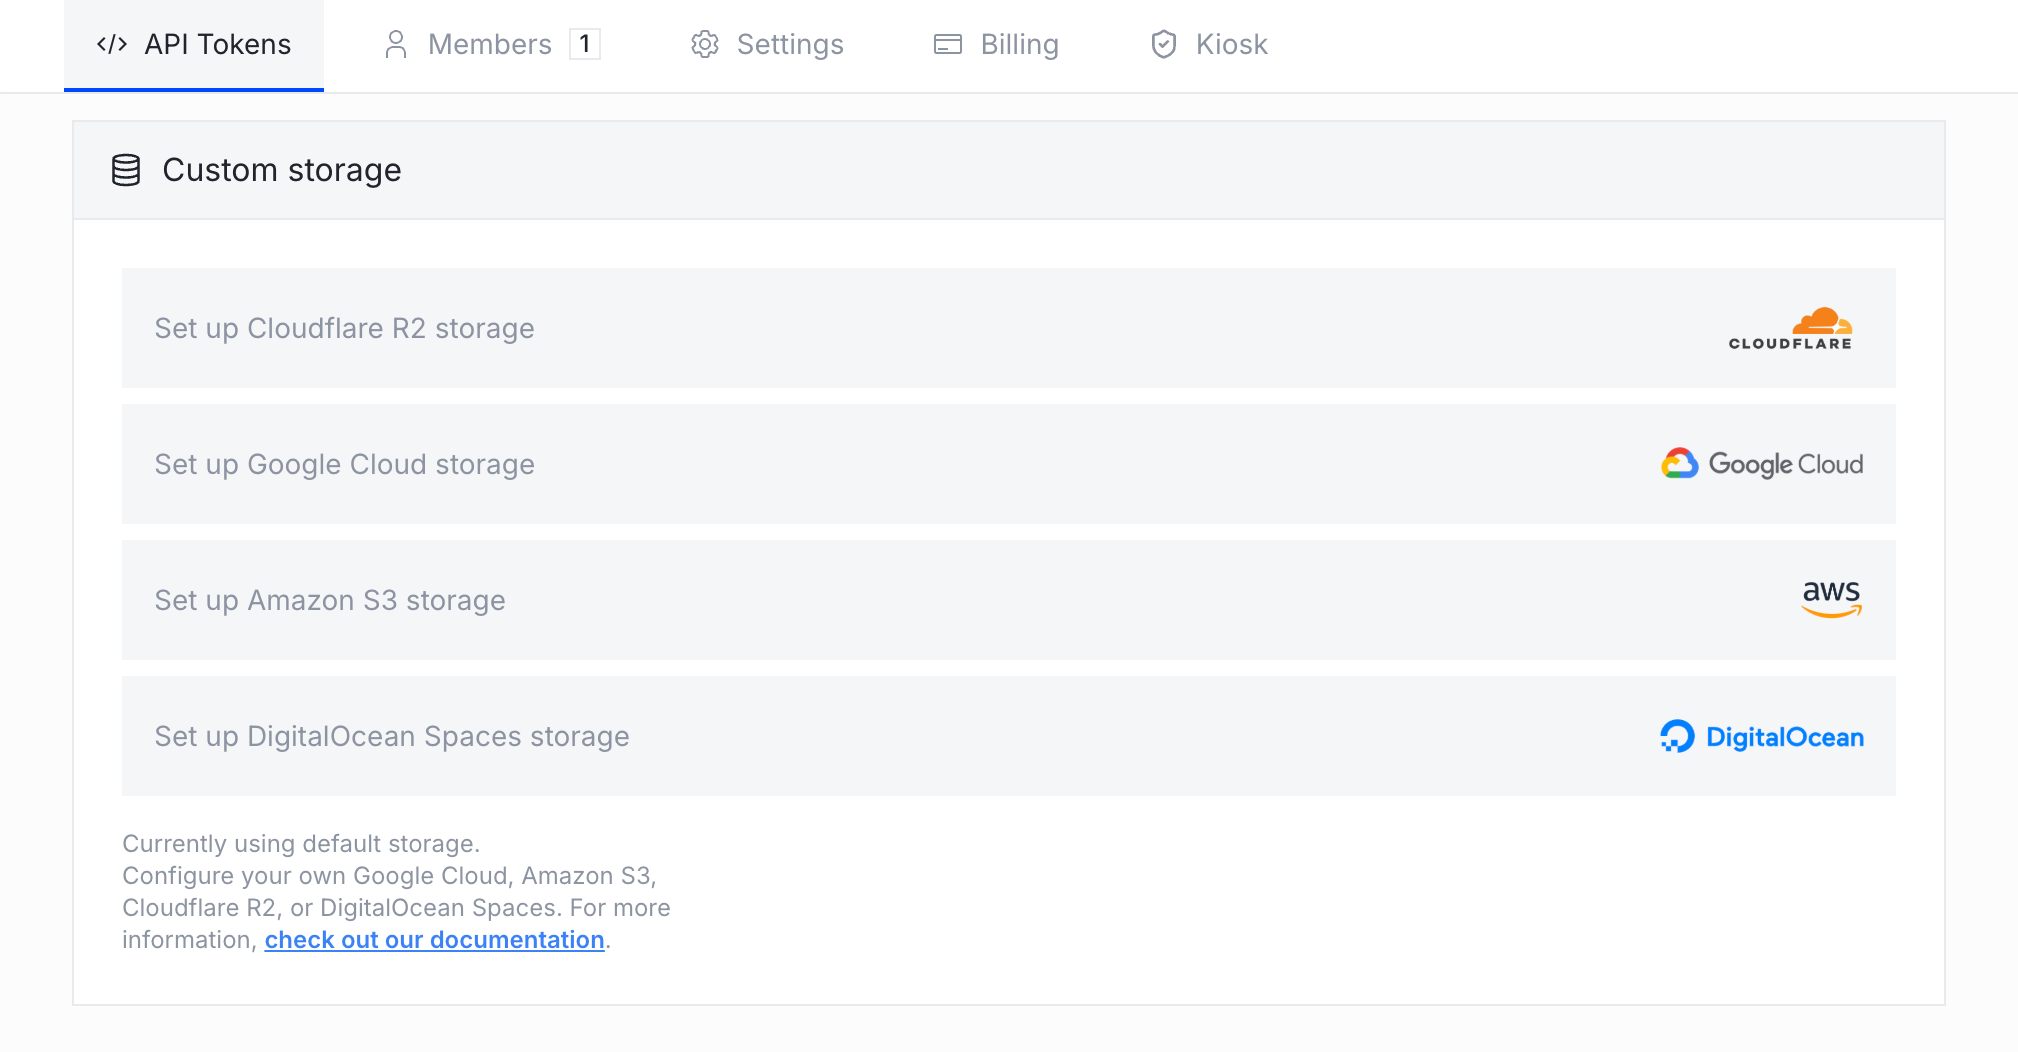
4) A modal will appear. Fill in the values you saved during the setup:
- Bucket name: the name of your Spaces bucket.
- Region: the region of your bucket (for example,
fra1). - Access key: the Access Key ID you saved earlier.
- Secret key: the Secret Key you saved earlier.
- Public URL: your bucket's Origin Endpoint (for example,
https://<bucket-name>.fra1.digitaloceanspaces.com).
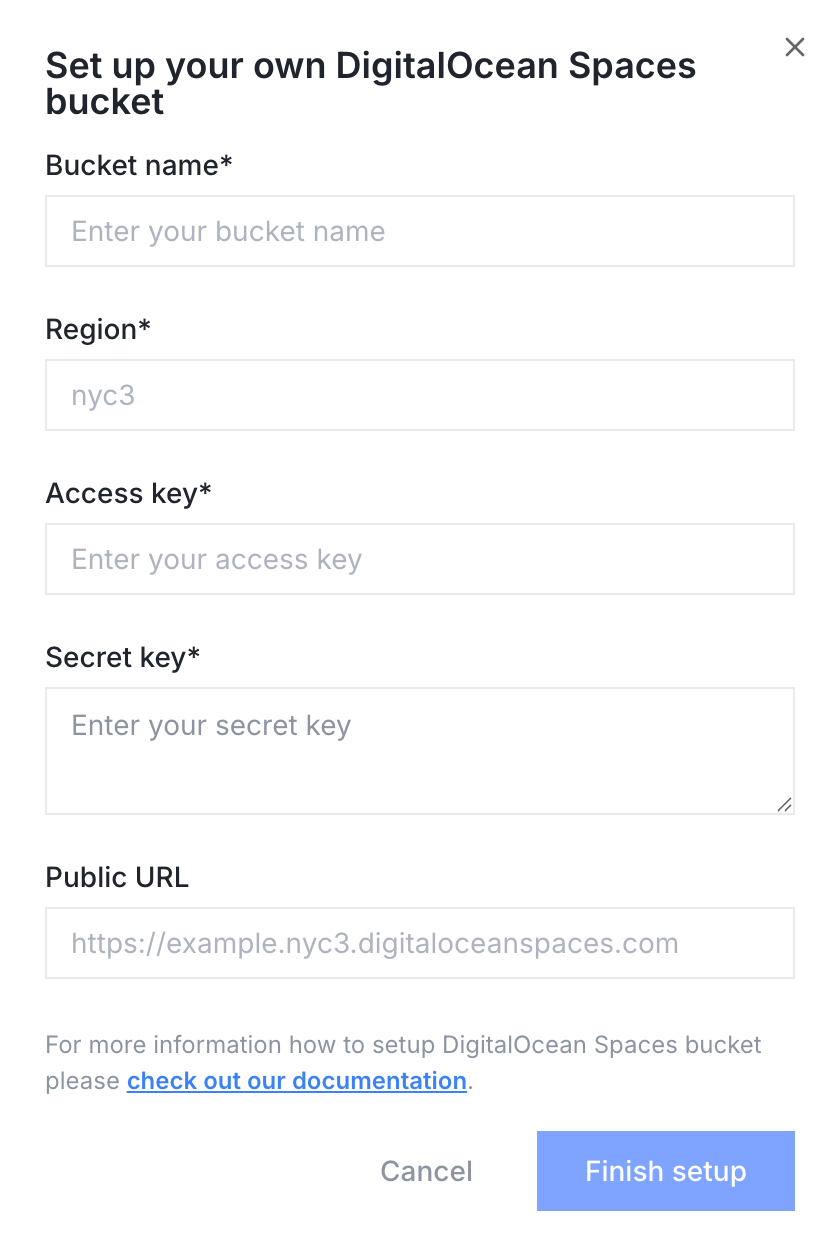
5) Click Finish setup.
Setup complete. The plugin now uploads files to your Spaces bucket.
If you hit any issues, contact our support.